|
Libby the Lab. Rebuilt war tech. Faithful pooch.
Image © Dean Spencer |
Previously, on The GLOW: 1996 Psychic Eustace Delmont
Psychic Eustace Delmont has gone on a Walk. In a massive indoor mall, aka The Citadel, he meets a hacker criminal named Hitomi Meyer. After fighting, and obliterating, a group of Patel family goons, Eustace and Hitomi are now trying to get to safety. They are heading to Century, FL where one of Hitomi's old allies can help take care of Bee.
About The GLOW: 1996 Psychic Eustace Delmont
Eustace Delmont is a psychic on the cusp of "graduating" into a full-blow Field Psychic. He requests his right to Walk, a brief period of freedom to encourage psychics to see the other side of The GLOW. He tries to finish his long-time partner Jani Blum's final unfinished mission: to find a mini-disc and crack open the Patel crime family. He meets Hitomi Meyer, a criminal hacker. The two are now on the run between a powerful crime family and an even more powerful adversary: The Order and its plans for Eustace.
Content Warning: Occasionally very foul language, lots of smoking, quite intense violence, drinking, gambling, non-graphic sex, drugs, criminal behavior, and black magic. The GLOW is a world of spiritual torture and weird horror.
This post is in the standard Doug Alone post style. See Anatomy of a Post for more details.
Attribution for the tools and materials used—including the splash art—can be found in the Credits below along with some details.
Making a The GLOW Map Table
 |
| A map for me to generate some random events in a more consistent manner. Explanation below. |
More so than the original arc where a lot of things were left up purely to the flow of the story, this time around I need a few new tools. The map above is one of those. Taking the 2023 Alabama state highway map from ALDOT, I have overlaid a 20x12 grid representing the local scope of The GLOW and the "near" GLOW. This gives me a way to roll for locations and to generally mentally map how locations are connected. There is no attempt, yet, to link this up to The GLOW's subway system or to map out changes in the roads. This is a bit higher concept than that.
Each grid is about 10 miles. It's not meant to be super precise but that's close enough. Take this with a grain of salt in that I might have really messed up my math. I don't need granular distance measurements, more of just a broad sense.
In the context of the GLOW, there would be anywhere from 1-5 additional grids worth of city off the coast representing the strange floating — as in on water — portions of the city. South of Mobile it would extended even further, nearly 70 miles off the old coast. This is where the more expensive houses and such are. Those are not indicated on the map because this is much more of a "Sprawl" type campaign.
This episode starts in Century, FL which is on the map in 18,1. The Citadel, which they just left, is 14,11. Just to establish such, the Blue Sky Grove is in 6,12 while The Rambler is in 9,9.
In this light, I can find out things like: Where is Hitomi's apartment? → 19,2. A place slightly south of the real world Jay, FL. In this world, it will be "Little Tokyo." A bit more built up than the anti-Order Century but also a bit out of the main stretch.
The GLOW: 1996 Psychic Eustace Delmont. Episode 2 — Gathering Supplies
Setting the Scene. Setting Up a Wild Goose Chase.
Date: Thursday, May 30, 1996.
Time: 6:52pm.
Place: In the parking lot of the closed RINA Auto Repair Shop.
Expected Scene: Hitomi is working on removing the tracker from the Patel Car.
Scene Test: [c116] 7. 8 + 3. A Minor twist/complication. On that card it has a catalyst of "law enforcement comes for you." Not a major-enough twist for that level of complication, but makes sense that they are in the area. Reason? [c3] has a person stabbed in the back. Let's say there is a murder in the back of RINA's lot.
Actual Scene: They are having to do this while some MUNI cops are investigating a murder very nearby.
Does the Patel car even have a tracker? (Good) → [c114] Yes.
Another thing from the c116 card is "Rest Plus Motel". Let's make it Rest+ and save that for later since I was going to eventually need a hotel or motel at some point.
Setting Up a Wild Goose Chase
Date: Thursday, May 30, 1996.
Time: 6:52pm.
Place: In the parking lot of the closed RINA Auto Repair Shop.
Hitomi is bent under the car while Eustace makes it look like he is trying to repair something under the hood. They are in the parking lot of RINA Repair Shop. What RINA might mean is lost to time since the sign doesn't say and the shop has been closed for some time. The front glass is exploded out. A couple of cars left behind are burnt husks. Some kids have left a stack of beer cans in a pile in the parking lot. Strangely that has been left undisturbed.
MUNI is around back, adding to the stress of being here, but the cops are caught up with a vagrant that got stabbed this afternoon. At least the body was found this afternoon. Eustace could probably solve the case for them with just a few quick seconds but at this moment they are just a couple of people with a broke down car who found their old favorite mechanic surprisingly out of business. That's the story they are going to tell if any of the MUNI asks what is up.
Because a burnt out shop is a great place to leave a stolen car after you have murdered the owners. No cameras. No scanners. By the morning it will likely be another burnt out husk or stripped for parts.
Hitomi looks over at Bee who is having a hard time keeping their eye off the cops. Hitomi is not sure if Bee is worried or just curious. Or horny. What Hitomi is sure is that if Bee keeps snagging her cigarettes, she is going to start charging her roommate tax. Bee has walked off with Hitomi's smokes and makes no move to give them back.
"Did you get it?," Eustace asks, wiping his hands like he just did anything at all to the car under the hood.
Hitomi holds up a tracker device and scoffs. "Let me stick to the tech shenanigans, you stick to other murder-death-kill." [1]
"You know, that's the first time I have ever killed anyone. In person. I've seen a few deaths."
Hitomi looks at him and realizes he is serious. "Fuck, I'd hate to see you with training."
At this time an 80s model car shows up — American — and an old lady gets out. Yuuki Jones. In her 70s, looks to be a hard-50s. By the general average life span of The GLOW, she has won some lottery. MUNI cops look up at her but glance away. To folks around here, must look like an old granny bailing her unruly granddaughter out of a fix.
"I brought your JUMPER CABLES, Mochi." Hands Hitomi a paper bag that has zero jumper cables but does have a change of clothing, a couple of credit sticks, some hair-dye, and some ammo for Hitomi's gun. [2]
"Thanks, おばあちゃん," Hitomi says, taking the bag.
"You call her grandmother?," Eustace asks.
"This huge 外人 speaks 日本語?," Yuuki asks, giving Eustace a very long glance.
"Don't let him lie to you, Yuu. He's psychic, apparently. Also, stop calling people 外人, you have lived her longer than most of these people have been alive."
"Hey, big psychic, what am I thinking about, right now?," Yuuki asks.
Eustace, not even looking in her direction, responds, "I'm about average size."
Yuuki cackles a smoker's laugh at this. "Ah, too bad, Mochi. Too bad. They make pills for it, though." The old woman then walks over to Bee and snags the cigarette from the younger adopted-grandchild's mouth. "And no smoking for you. Save that for us grannies."
"You got Bee for the next couple of days?"
"How much trouble you in?" Yuuki notes the blood on Eustace's jacket that Bee is still wearing as an all-in-one outfit.
"Patel-sized."
"This boy's fault?"
Hitomi looks over at Eustace. "No, someone else. He was trying to help. Only it got worse. You'll catch it on the news, tonight."
As Bee leans up against Yuuki, Hitomi walks over to her young friend. "You help out at the store, ok? I'll be back in a few days. Hopefully. Also, kill the hair."
Bee sighs and touches a node on behind their ears. The sea-green hair settles down. With another tap it shifts to a bland bad beach-blonde look. The effect won't catch anyone off guard who knows Bee, but those who don't would have a hard time picking them out of any average plain teenager.
Hitomi looks around in the fading daylight and then finds a casual way to walk over to the MUNI car like she is being curious. Once she is sure that none of the MUNI are really paying attention, she quickly bends over and slips the tracker to the underside of their bumper. That should confuse the Patel gang. [3]
Rejoining Eustace, Hitomi says, "Ok, Nurse, we need to grab a bus and head to Little Tokyo. Grab my stuff if we can get to my apartment in time. Hopefully they haven't hurt Libby."
Setting the Scene. Getting Libby and Getting Betrayed.
Date: Thursday, May 30, 1996.
Time: 7:30pm.
Place: Outside Sasaki Ramen Bar in Little Tokyo.
First, has Patel's people found Hitomi yet? (Good) → [c1] Yes? They are close but won't show up until later in the scene.
Second, Hitomi did really well with getting the device and planting it on a cop car to lead some of Patel's heat on a wild goose chase. Will give her an adrenaline up to 4.
Expected Scene: Hitomi and Eustace try to get stuff from her apartment before Patel's people show up.
Scene Test: 5. 2d10 = 5 + 7. Another Minor Twist. "A secret is revealed or betrayed." The Sasakis turn in Hitomi for a reward.
Actual Scene: They get to the apartment before the goons, but the goons will lie in wait for an ambush.
Ah, The GLOW, where getting sold out by people you think are your friends is just a minor twist.
These two need to be tougher. We'll use Bad Guys Template 1 to show the increased intensity. Roger Patel can't imagine the slaughter was due to a kiosk owner so assumes it must be a rival gang. Still, he wants Hitomi to find out what happened to the mini-disc. 5 Grit with 1 Hot Box. They have Automatic Weapon and Martial Arts feats. Attack: Critical. Defense: Critical. Like before, their weakness will be Patel's people aren't good at working together. Names? [c48] Ecrin and [c45] Leonie.
The owner's name, Sasaki, by the way came from the Japanese Surname table in The Book of Random Tables: Cyberpunk 3.
 |
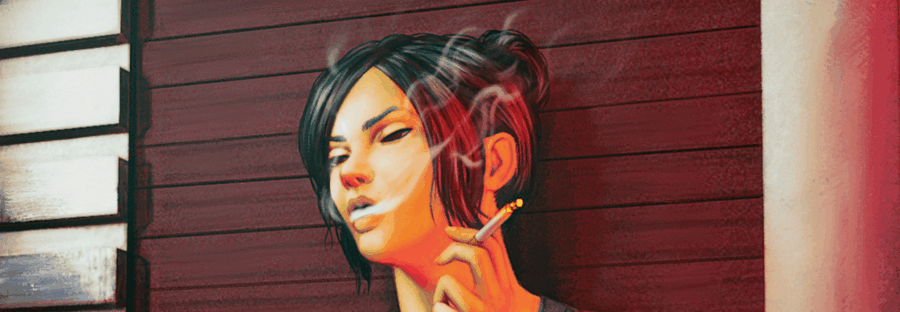
| Outside Hitomi's Apartment in the Little Tokyo portion of The GLOW. Above Sasaki Ramen. |
Getting Libby and Getting Betrayed.
Date: Thursday, May 30, 1996.
Time: 7:30pm.
Place: Outside Sasaki Ramen Bar in Little Tokyo.
Eustace hears Hitomi ask him, "Anything?"
He turns and searches through the psychic threads. "Yes. Very close. Two of them. We don't have a lot of time." [4]
"Okey doke." She pulls out her gun and makes sure it is ready to go. Hands Eustace the three laptops she is carrying and hopes that if he has to go berserker again he will not completely smash them up. "The Sasaki brothers have been very nice to me and let Bee and me crash here. I'd rather them not get hurt in this. Even if they are ex-Yakuza hiding out here to avoid some heat from actual Tokyo.
She leads him down a alley far cleaner than any he has seen in The GLOW, up some stairs, and to a door she hastily unlocks. Counting down 3, 2, 1 on her fingers she shoves it open and then aims her gun inside, to nothing but a dark apartment smelling of stale smoke and old ramen. One benefit to living here is getting a lot of cheap food for small favors.
Red eyes light up across the room, followed by a small mechanical canine. Hitomi bends down and pets it like is a real dog. "LIBBY!"
"That's Libby?," Eustace asks.
"Yep. Libby the Lab. My own little walking, barking chemical and electronics analyzer. Get it? Lab? Bee came up with that one. Found her in a scrap yard and fixed her up. For a psychic, you sure seem surprised a lot."
"I am trying to respect your privacy. I trust you to tell me what is important."
She glances back at the big man and gives him a wink. "Stop, Nurse, you already getting laid tonight. First, though, let me get my gear and some smokes to replace those that Bee stole."
She spends only a couple of minutes snagging up a backpack, shoving the laptops in, several packs of cigarettes, a couple more cred sticks, and a couple sensors and detectors.
As they make their way back downstairs, Libby following, Eustace tenses. "I think they are here." [5]
Sure enough, coming around the alley from the direction of the street are two more Patel goons. These look a bit better put together than the last ones. The bit that upsets Hitomi is that Junya Sasaki is behind them. "Yep, that's her. No hard feelings, Hitomi." And with that he is gone. [6]
Dark woman who looks a lot like Quiet and Dark from earlier steps forward pulling a gun out and pointing right at Eustace. "Come with us. We have to talk to you about a certain mini-disc and what might have happened to my brother."
"Ah, shit," Hitomi says, because that has to be a real bad sign.
"Marius's men hit them after Hitomi gave them the disc," Eustace says, "We just got out there before this weird guy with katanas started to chop up everyone. Sorry we can't help."
Hitomi knows Eustace means Thom Marius. A rival industry-man-turned-gang-boss to Roman Patel. Interesting, Talkative and Dark seems to believe him. "Marius? The fucker is making a move?" She looks back at her red head extremely Irish looking companion and then shrugs. He takes out his gun and now aims at Hitomi, "Thanks for the heads up, but no disc makes this easier." [7]
Eustace is moving before Hitomi gets her pistol up. As he is closing the gap she has taken a bead on Very Irish and pulled off a shot. He grunts but stays up. By this time, Eustace is at the presumptive leader's side and bringing down his arm blades. She tries to throw a kick to block them but the blades catch her in the shoulder and keep going down the length of her body until she is split in two. [8]
Very Irish doesn't break stride at seeing his partner killed. He pulls the trigger and catches Hitomi in the shoulder. Then he runs up and kicks Eustace in the head. The big guy stumbles down but seems to roll pretty well with the fall. [9]
Hitomi moves forward to try and cover Eustace and despite being a bit shook-up after being shot, she manages to drop Very Irish with a headshot. She pulls Eustace to his feet. [10]
Eustace looks down her injured arm and bends forward to tear a strip off her shirt and starts wrapping her up. At the same time, she checks his head for injuries. He seems to have fared better than her.
"Will your landlords tell the cops it was us?"
"You know what, fucking probably. What the hell happened to honor?"
"We live in a city powered by tortured souls," he says, shrugging. Then picks up the two corpses and walks into the Ramen bar (the customers having already fled). A few second her and Libby follow inside. She is afraid of seeing blood dripping from everywhere but instead Junya is grabbing keys from the woman's pocket and rushing past her to hide the car while his younger brother — she has never caught his name — is helping to drag the bodies in the back while apologizing to Eustace. "I had a talk about turning armed thugs against someone who helping The Order and they saw common sense. They are going to help hide the evidence and say that a group of weirdos with rooster masks taunted the Patels here and they ran off after shooting a few shots and taking some hits. And that no, they don't know where you are. They heard you were heading down to Mexico. Or I would rat them out to the authorities. That's for betraying your trust. You need to get to their security system and hide this footage." [11]
Setting the Scene. Holy Revenge.
Before we figure out exactly what sort of scene this might be, a question: Does Hitomi know someone who might sell her a decent car | bike for $2? (Even) → [c94] No. This means they are going to have to steal one or keep taking public transportation. Let's generate some details about a place where she might steal one. [c16] has "FaithCorp Featuring Jesus 2.1" and a picture of a saw blade. [c67] has Akari as one of the names as a visual identifier of "pristine pressed clothes." [c113] has a video camera and an icon that is a virus but it also makes me think of little droids. Maybe little droids with cameras. The catalyst text is "A high-stakes wager is offered."
What was the nature of the wager? [c81] Unseal [c9] Profitable [c4] Research. A couple of image icons for this → [c13] I...don't actually know what that icon is meant to be. Ah, cannister. One more just for a bit more flavor: [c25] Dead Head.
I have some good backstory, now.
Date: Thursday, May 30, 1996.
Time: 8:37pm.
Place: Near FaithCorp's Holy Church of Illumination. Cottage Hill, FL.
Expected Scene: Hitomi and Eustace scope out the Holy Church of Illumination — in reality just a big garage with a bunch of people ensnared by Dave Akari — and make plans to snatch a particular bike.
Scene Test: [c94] 5. 2d10 = 2 + 6. Another minor complication. [c96] A chase or pursuit breaks out. An image on that same card is a note held in place with a dagger.
Actual Scene: As H & E watch, another gang shows up and starts wrecking the place and several of the workers take off after them.
Dave Akari, 32. Street prophet and con-man. Five years ago, ran jobs with Hitomi. Eventually they were made a wager by one of Dave's contacts. If they could steal data from an Order outpost, they would get the cash they needed to set up a real shop. Turns out the data was about The GLOW's usage of recently deceased individuals to feed more fuel into the Harrowing, something The Order denies. Hitomi succeeded but Dave betrayed her while she was still coming to terms with it. They money he made from that deal ended up funding FaithCorp, his "rehabilitation for sinners" for-profit church. It engages in a lot of shady dealings with unhoused folks, recovering addicts, prostitutes, and other people that The GLOW grinds under its massive feet. Only, he turns their guilt into his own wealth.
The Holy Church of Illumination is a chop-shop that claims to be overcoming the sins of earthly possessions. Stolen vehicles are brought and broken down as "penance." Dave sells off vital parts to a number of buyers. And, if one of his parishioners drop dead, his contact from five years ago has a particular use for them.
Hitomi has never quite gotten over the betrayal, both emotionally — it was a shock and Dave was like a big brother to her and taught her several of her skills — but also financially. She has curtailed doing any big jobs again and ends up spending a lot of her cash helping out others to make up for past actions.
Not only should there be a lot of vehicles here, but she wants Dave's own custom bike.
Is Dave in this time of night? (Even) → [c100] No.
What time will he back? → [c92] The arrow is pointing to the "2," essentially. {am | pm} → pm. This means he has night and morning managers.
And I finally get to use Augmented Reality. The rival gang that shows up for the Illumination group is the 50 Panzer 62 Killaz. They are 67 Rag-Enshrouded, 15 All-Female 31 Chromers who 50 Target Small-Fry fixers and gangers and steal their shit to sell. I think that explains it pretty well.
 |
| The Holy Church of Illumination. Chop Shop for the Burnt Out followers of JesusCorp. |
Holy Revenge
Date: Thursday, May 30, 1996.
Time: 8:37pm.
Place: Near FaithCorp's Holy Church of Illumination. Cottage Hill, FL.
"The Holy Church of Illumination," Hitomi explains while her and Eustace — and Libby — watch from the rooftop of an abandoned movie theater. The sign on the marquee reads BAT LE AN EL. "JesusCorp bought out the whole block and now his holy rollers drive out most everyone else."
"True believers?"
She takes a drag on her cigarette and points out the drifting Soulburn. "Pretty dumb to not believe."
Eustace keeps mum. He knows that she probably sees a gentle neon after-image. To him, the city is Soulburn. Reality is the fuzzy bit. The emerald lines of psychic threads keep showing up and each and everyone keeps pointing to her. This bothers him. For lots of reasons but mostly because more and more he feels like he is being watched. He glances back behind him and wonders how long before there are fox masks there.
"Why are we here, Hitomi?"
"Mochi. Call me Mochi. My friends do."
"Fine. Same question. Why? Here? Mochi?"
"Church is run by a scumbag named Dave Akari. We ran together back in the day until he betrayed me right as was dealing with existential shit and got a lot of money out of it."
"Ran together?"
"Not like that, you creep. He was like a big bother picking up another lost girl in Little Tokyo. Half-Nigerian, Half-Japanese. We made a pair. Talked about taking down the system. Then he became the system. Got some people killed. One person in particular. Rika. She and I did run together. Like that." Hitomi sniffs. Not exactly sadly, not any more, but definitely a step in that direction. "He got too well protected for me to do much. Took enough gear from our collective stash, I spent a lot of time trying to work my way back up. Then I met Bee and took them in. Realized I could do more with money than get rich." [12]
"This is revenge?"
"Got a problem with it?"
Eustace looks at the emerald line, well beyond Hitomi's ability to even sense, as it runs through her and around her. "No. I think you are stuck with me."
"Let's see how you are in bed first. And, to answer your question: No. I mean, yes, of course it fucking is. Only the good Church is a lie. The holy rollers are all refugees of The GLOW bent into religious disciples by Dave. This particular branch is all about taking material possessions — in this case various stolen vehicles — and breaking them down to purify them of the sin of expensiveness. Dave then takes the parts and sells them on. Tosses a few bones back though the holy rollers could be paid in dog feed and still worship the man. He's Jesus 2.1. But a bunch of stolen cars means we can snag a ride. With luck, Dave's there and I can take his fancy bike he likes to show off around town."
Eustace reaches out and pulls her back right as a few bikes and decked out cars tear through the night. A group of people, maybe a dozen, dressed in strange rags like leprous penitents, ride up and jump off. Flashes of chrome show through the outfits as gunfire erupts. A few seconds later they run out carrying a sack of something — probably aether-boards stripped from top models — and drive off. The holy rollers — heads shaved, drably dressed, and tatted all over with crosses and JesusCorp versions of Bible verses — run after them, a few cars joining the chase. There are a lot more of the rollers than this new gang.
"Holy shit!," Hitomi exclaims, "I think that's the Panzer Killahs. Lesbian chromers who play at wasteland garb. They like to hit smaller gangs and steal shit. Half the fun is stirring up trouble."
"They look clearly outnumbered by the rollers."
"Means it's likely a trap. Also means we have a great chance to get inside. Watch out for Dave's security bots."
Setting the Scene. Going to Bloody Church.
Date: Thursday, May 30, 1996.
Time: 8:46pm.
Place: First Floor of the Holy Church of Illumination. Cottage Hill, FL.
Expected Scene: E+H blast through the first floor and try to make their way upstairs.
Scene Test: [c41] 8. 2d10 = 9 + 10. A MAJOR twist. Fascinating. Let's draw three cards to work out what it might be. [c32] Reveal a tension or rivalry. "Mischa." [c1] Domestic Papers + image icon of a hand being cut off. [c29] Destroy Anachronistic Government.
Actual Scene: Expecting it to be mostly abandoned — except for the security bots — they find that a coup is underway as Mischa and her apostates are violently trying to reform the church.
This means the humans are mostly caught up in their own struggles and that there is a bit of a clock before all the stuff that Hitomi might want — a ride, information from Dave's computer — might be destroyed if they lose momentum. I won't formally "clock" it but once a couple-three failures pile up, they will essentially be out of time.
Security Bots will be confused by the action and looking for something to attack. Attack: Critical. Defense: Critical. 9 Grit Boxes. Hot Box at 3 and 7. They armored (-1 to hit) and a Walking Hazard (Gamble to attack them [in melee?]).
SCENE SOUNDTRACK: The album I will be playing while playing this scene is Perturbator's Lustful Sacraments. It seems appropriate.
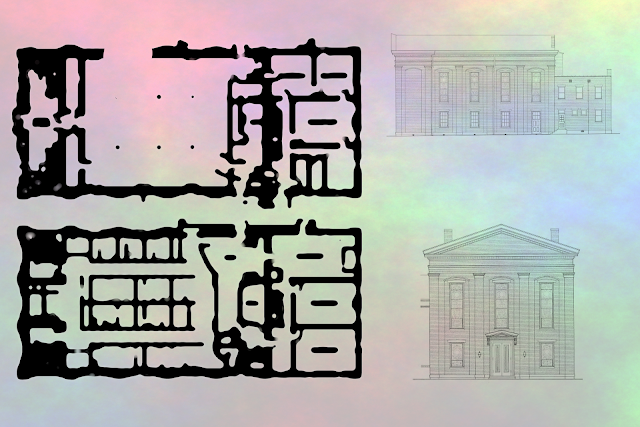 |
| The Holy Church of Illumination first and second floorplan. Also an image of what it looked like before extensive conversion into a car garage pretending to be a church. |
Going to Bloody Church.
Date: Thursday, May 30, 1996.
Time: 8:46pm.
Place: First Floor of the Holy Church of Illumination. Cottage Hill, FL.
"FUCK!," Hitomi screams as she pulls back her head just in time to avoid being splattered with blood. She had hoped the Church would be mostly abandoned after a good contingent of rollers took off after the PK. Instead, she nearly ran into a slaughter as one group of rollers is currently slaughtering another group. "What is this shit?"
"Schism, I guess," says Eustace coolly. The only detail he notes is that side leading the slaughter all have fresh, bloody crosses carved into their foreheads. Upside down.
"I guess it really was a trap," Hitomi says, "Some sort of inside job." As if to underline the point, a large explosion and screams can be heard coming from the direction the PKs lead the other rollers away. "Don't really fancy trying to make our way through the blood bath."
A couple of un-marked rollers take off out the door, barely paying attention to Eustace or Hitomi.
"We can just snag the nearest vehicle and try to go."
"No, I want to see if I can get to Dave's office. Might have some vital intel."
"Climb?"
"Think we can?"
Eustace looks up and shrugs. He extends his blades and starts punching out handholds and going. He's not super quick with it, but he is making his way up. [13]
Hitomi watches him go at a snail's pace before going, "Fuck it!," and starts climbing after him. "Libby, go and hide yourself and only come out when I ask, got it?" Libby lets out a small mechanical bark. Within a couple of seconds she has climbed past Eustace and smashed open a window. She turns to help him up. [14]
As they are setting foot on the carpeted inside, they hear a high-pitched whine as one of the security drones' flechette launcher warms up and dive behind a table as sharp, thin projectiles embed into the old wood. The room they are in is a conference room and looks out of place in the overall decay of the region. Luckily, the table is thick enough to take a few hits. Unluckily, more of the bots are entering the room. They look something like crabs with a tall column for a head. At the top of the column is a camera. To either side is flechette launchers. Pincers can detain a trespasser if they can grab you.
Eustace leaps over the table to go after the first one and manages to slice through the metal but in the process takes a cut along his arm. Hitomi stands up and starts aiming for the cameras and takes out a couple of control units at the top of the bots closest to her but another hits her in the leg with a flechette. [15]
The four bots in the room now open fire with a stream of blades. Hitomi works to dive behind the table while Eustace snatches up a chair to block. Neither are completely successful as blood is dripping from Eustace's chest and Hitomi has been hit in the side. [16]
Eustace reaches out his hand and psychically shoves one bot into another with enough force to cause all three to explode. Hitomi tries to shoot down the last but mostly keeps it distracted. [17]
As the remaining bot swivels its busted out camera head, a red light starts flashing. A high pitched beeping speeds up as it nears a self-destruct sequence. Hitomi braces for the explosion but Eustace leaps forward and kicks the bot back out the door. An explosion shakes the building. [18]
"Are we having fun yet?," he asks as he helps her up.
"This might too much fun," she replies.
They make their way into the hall and see the explosion has damaged the floor. Shouts downstairs can be heard through cracks showing a bit of the workshop floor below. It can still hold, maybe, but it will be a bit of gamble. [19]
Eustace goes first, again. He makes it across but the boards make a cracking noise. Hitomi looks and takes a few light steps over and tumbles to the other side right as the floor gives way and falls down. Based on the shout, it took out one of the combatants. [20]
"Come on, Nurse. We have to find Dave's office before the crowd downstairs comes to investigate." Luckily it doesn't take her long to find Dave's office. "Block the door!" Eustace has enough to drag some heavy furniture across to seal the door. Voices are shouting outside as some people have found the wreckage in the floor and the smashed bots. [21]
Dave's office is a lot like most pastor's offices, only a bit more neon and garish. The nude photos of bald men and women take on a flavor in the strange lighting. Hitomi looks down at Dave's desktop computer. There might be a lot of good information on it but time is short. "We need to get out. Can you carry that?" Eustace nods. She aims her gun at the window and shoots out the glass. Then she runs up and leaps out. Eustace follows her.
Both hit the ground, Eustace takes a bit of the brunt of it while holding up the computer tower. Hitomi rolls with the fall and is up and running back around to the front of the building. Now that slaughter has finished and the strange apostates are upstairs trying to find what caused the explosion, she has a brief window to actually grab a vehicle. [22]
She leaps on a red motorbike. "GET ON!," she shouts at Eustace. He gets on behind her, still holding the computer. She pulls out into the alley and whistles for Libby. The mechanical dog runs up and attaches itself to the back of the bike. They ride off into the night.
They can hear other vehicles leaving the church but for a moment they have some freedom of movement. [23]
Setting the Scene. Resting Up.
Date: Thursday, May 30, 1996.
Time: 10:26pm.
Place: Room 1217 of Rest+ Motel. Outside Pensacola.
This is a Time Out so no scene test.
Factions are fun in cyberpunk. We have the JesusCorp Holy Rollers. The Apostates. The unknown Dave Akari associate. The Patels. The Mariuses. The Panzer Killahs. Some are working together. Some are against one another. Should give me plenty of meat to chew upon for the next shot or two.
Overall, though, it is time for a Time Out.
SCENE SOUNDTRACK: You can play whatever sexy synth music you want, but I will go for Veno's "Midnight Lu Rou Fan" for a nice sexy love song about dealing with late-night horniness with some nice spicy pork and bok choy. Wink.
Time Out #1
Hitomi and Eustace get both of their grit back.
Eustace uses one of his actions to Heal Hitomi. She loses the Nervous condition.
Hitomi's first action will be to try and get into Dave's computer. Crime + Fix +1 Help from Libby = Double Critical. Excellent roll. She will start off next session finding all the information she wants to find.
Eustace's second action will be to Fix the bike. He gets a Critical. Enough to have up to "Standard Bike Quality" but not enough to really improve upon it.
Hitomi will then spend her second action going investigating in the aethernet. She's going to try and find a job. Focus + Streetwise. Critical + Basic. Likewise, she will have a good lead for the next session/shot.
For the general handling of themselves and working together the last couple of scenes, two adrenaline for each.
Now for the scene itself.
 |
| Rest+ Motel. Near Pensacola. |
Resting Up.
Date: Thursday, May 30, 1996.
Time: 11:26pm.
Place: Room 1217 of Rest+ Motel. Outside Pensacola.
After working on the bike — he's already calling it the Red Devil — he re-enters the motel room and sees Hitomi hunched over two laptops and Dave's stolen computer, furiously typing across all three. A half-dozen cigarettes tell the story of a battle she has been having while the smile on her face tell the story of her winning. A seventh cigarette is in her mouth and she seems oblivious to his presence. The air is thick with smoke and opens one of the windows just a crack to let a few atoms of oxygen in.
"Shower," he says and she gives a little wave.
Five minutes later, he is washing some of the blood off his chest when she steps into the shower with him. He has a moment where he feels his heart rate increase for an unexpected reason. She has a tattoo of a fox clearly visible on her thigh.
"Why the fuck is it so cold?," she asks.
He says nothing as he leans forward and turns the heat up, keeping an eye on the tattoo and wondering when paranoia is not paranoia. Hitomi groans contentedly as the now hotter water works the kinks in her sore muscles.
"Did you get into the computer?," he asks and she shushes him. Hands him the bottle of complimentary shampoo.
"Sponge bathe time, Nurse."
Working up a lather, he starts washing her hair as gently as he can. She leans back into his arms. He feels her hands come up and start stroking his aetherware. Without reading her mind, just going on vibes, he answers the question he assumes most would have. "I can feel stuff through them ok. It's different. A whole new set of nerves. But it's not exactly missing all feeling or constantly numb or anything like that."
She rinses her hair and then turns to face him. A whole lot of possible words pass by her mouth and she once again opts for the simplicity of a long kiss. Begins feeling along his body with her hands. "I see quite a few things are in their natural state."
"The attachments are on back order from Taiwan, sorry."
"Good, I want you to feel this." She slides her hands and mouth down his body, leaving a trail of kisses. Enjoying the hardness of his muscular body. The reaction to her touch. After a few moments of very much feeling it, he reaches down, picks her up, and carries her to bed.
Half an hour later, the two lie nude. Finally dry. She has lit another cigarette and he is holding the ash tray on his chest. She flicks ash and lets out a little sigh.
"Hitomi..."
"Mochi."
"Ok, Mochi, I..."
"New rule. We don't say the L-word. Ok?"
"Oh, I wasn't..."
"Another new rule. We don't say that we weren't going to say the L-word. We just take it as fun and we find more fun things to do this next couple of days."
His turn to sigh. There are so many things he feels he needs to explain to her. What 91% might mean. What could happen if he goes rogue. How he refuses to read the future because he doesn't want to know. How he just wants to stay in bed with her for a week and then maybe run as hard and as fast as he can. Instead, he opts for something a little different.
"Rub right there, the ticklish bit on my side." As she does, he reaches out and shares the feeling with her. She grabs her own side and he sees her work through what it means.
"You can do that?"
"Yep, the favorite flirting trick of psychics everywhere."
They eventually get some sleep.
DOUG'S COMMENTARY
February 4, 2025
This is scheduled to go out on Valentine's Day so happy sexy times — snuggle times, just friendly times, whatever you need — for the two biggest dorks in my arsenal of dorks.
I thought about swinging the sex scene even sexier but I think that's my limit without abruptly nose-diving into corny. Just more experimentation to get the more-ness of The GLOW down. More violent. More passionate. In its way, more loving. When your friends and loved ones might die or disappear due to street violence any moment, you both put up shields around your heart but also rapidly let people in from time to time.
The "Mochi" nickname is in full lock here. Much like the Weird version, a little nickname from her mom. One she shares with those people like Yuuki, Bee, and now Eustace she truly trusts. Though she has been burned a few times so she is going through some doubts.
Originally concieved as a kind of quick half-shot to round out the first post, this one grew to have a lot of fun elements. The betrayal by the Sasaki brothers. The Holy Church. The Apostates and the Psycho Killaz. The building up of factions. Holy Rollers is very nearly a Pensacola joke. If you have ever been lectured about the nature of sin at a P'cola beach, you know exactly what I mean.
The bike was an easy grab — well, after going through a couple of rough-ish battles — because the artwork I picked and will use a bit later shows Eustace on a red bike. I thought about just starting him out with one but this way was a lot more fun. Libby the Lab is also potentially fun. I think both will be the kind of gear that needs a lot of TLC. Less a full on cheat and more part of the young-couple-on-the-run aesthetic.
The Century use, and Foodland, was a shout out to the days when Doug was a young'un. Family would make weekly roadtrips down to Century, FL to get groceries. I don't think it was a Foodland. I don't remember what it was. Looks like it is a Food Giant now. I have no idea why we would drive half an hour to get food there. Presumably it was just cheaper. Maybe they had cheaper cigarettes or something. Family would also pick up lotto tickets. I should probably work that into the next session.
Before I play the next session, I want to re-read the Outgunned rules. I think I have them around 70% down. Still a few edge cases I am fine with just ruling on to make it fun for now, but would like to try and get it right before I purposefully screw it up.
Going to experiment a bit more with including more pictures, a few "actual play" sections, and the scene-soundtrack notation. Each arc is a way for me to experiment and the trying out soloing different systems is a good time to try out a few new techniques as well. I might make an intermission post just to so some of the process.
Next time will bring in either Augmented Reality or Cities Without Number to generate a job, or two. Then after they get some cash and can actually do more than hide out, we'll work back around to the first Turning Point: rescuing Amy Patel.
MECHANICAL AND STORY NOTES
- Crime + Fix and Hitomi only needs a basic to disable it. She gets an Extreme so she not only takes it out but she keeps it working. Heck, she might improve its broadcast range.
- In the terms of Outgunned, not enough money to count as a $1. More like spending cash to help with note keeping later.
- Crime + Stealth. Gets a Critical success.
- Focus + Detect with Super Senses. Gets a Critical.
- Gave him +1 help this time since he knows they are coming. Only a Double Basic so he again senses them but not precise info about from where.
- Like the surname, first name comes from Cyberpunk 3. Japanese Male name with a 79 on the roll.
- Eustace only gets 4 dice from his Smooth + Speech but with his Silver Tongue is able to pull a Critical. Does Ecrin and Leonie just let Eustace and Hitomi go? (Bad) → [c66] NO! Ah, well, it was a nice attempt.
- Hitomi, with her Gunslinger Feat, still only gets a Critical and does 1 Grit. Eustace burns another Adrenaline to get +2 along with his blades for +1. However, he loses one because of their Martial Art feat. He gets an Exceptional. This does 3 more and will finish off Ecrin. Leonie is going to get +1 Adrenaline for his turn.
- Hitomi gets no successes and has two 1s. She takes two grit damage and gets the Nervous condition as per Leonie's feat. Eustace gets no successes and gets knocked down but has no 1s so doesn't seem to take Grit.
- Hitomi is at -1 for her Nerves. She still gets the shot off by spending an Adrenaline.
- Eustace doesn't play when it comes to taking lives casually. He burns a Spotlight to make it very clear that they will NOT remember Hitomi and instead will come up with a story about something. Anything else. A flip of the coin and he gets the spotlight back.
- Rika is 23 on BORT: Cyberpunk 3.
- Brawn + Stunt. Gets a Basic.
- Crime + Stunt. Gets a Critical and a Basic. She's a lot better at this.
- Brawn + Fight. Adrenaline to get another +2. -1 for the bots' feat. Gets a Critical but has a 1 left over. Hitomi gets an Extreme for 3 grit damage. She also has one 1 so takes one grit. Bots have 5 grit remaining and get 1 adrenaline for their move.
- Both Eustace and Hitomi get Double Basic to reduce Grit loss to 1 each.
- Eustace spends a spotlight and uses his psychic push to damage the bots, doing 3 grit (down to 2). The bots get another adrenaline. Hitomi only gets double basic so we'll give her and Eustace a bonus on the reaction roll. Coin flip gives back the spotlight.
- Bot is going to self-destruct. We'll play it like Grenade but reduce damage to Critical to represent Hitomi's help. Brawn + Stunt for both. Eustace gets a Extreme and manages to kick the bot into the hall, where it explodes.
- Did the explosion damage the floor? (Even) → [c88] Yes? We'll say it is holding up enough but it's a gamble. Literally. A failure will result in the floor giving out and the person falling below.
- Eustace gets Double Basic but no snake-eyes. This worsens the condition so Hitomi needs a Critical. Spending adrenaline, she gets a Critical + Basic. She makes it just fine.
- Crime + Awareness + 1 help for knowing how Dave works and also spending a lot of time around her dad's church. Critical + Basic success, again.
- Eustace gets a Basic and takes 2 grit. Hitomi gets a Critical.
- Are the apostates going to give chase? (Bad) → [c50] No? They are, kind of, but for now not the best.
CREDITS
The GLOW 1996: Psychic Eustace Delmont is played using Two Little Mouse's Outgunned and Outgunned: Action Flicks (especially, but not limited to "Neon Noir" and "Great Powers"). It uses Larcenous Designs' Gamemaster Apprentice Deck: Cyberpunk 2E as its main oracle.
Other sources used include:
- Zach Best's Universal NPC Emulator.
- Cesar Capacle's Random Realities
- Kevin Crawford's Cities Without Number
- Matt Davis' Book of Random Tables: Cyberpunk 1, 2 and 3.
- Geist Hack Games and Paul D. Gallagher's Augmented Realities.
ART CREDIT AND EXPLANATION
Some images © Dean Spencer. Used with permission. All rights reserved.
I've been keeping the in-joke of a new Libby the Lab in the back of my head for a while. A War Tech dog made by Moment Labs. Now a different sort of lab capable of chemical and electronic analysis. Kind of a Doctor Who K-9 figure. But ragged and prone to breaking down. Which is possibly a very Doctor Who K-9.
The map (aka the real world map you can see in the grid) is provided by the Alabama Department of Transportation. I used to love getting the Alabama road map every year. Like, love it. I had stacks of them when I was younger. It made my heart a bit glad to get to bring that use one again.
The image of Hitomi's apartment in "Little Tokyo" is uncredited on Pixabay. I'm trying a slightly experimental way of showing a glimpse of how someone like Eustace who can see details and shapes in the Soulburn might see the world. That take is around...80% correct. The idea is that he can make out the general details just fine, and finer details as he focuses, but the edges get lost a bit as the Soulburn actively seems to be trying to communicate with him.
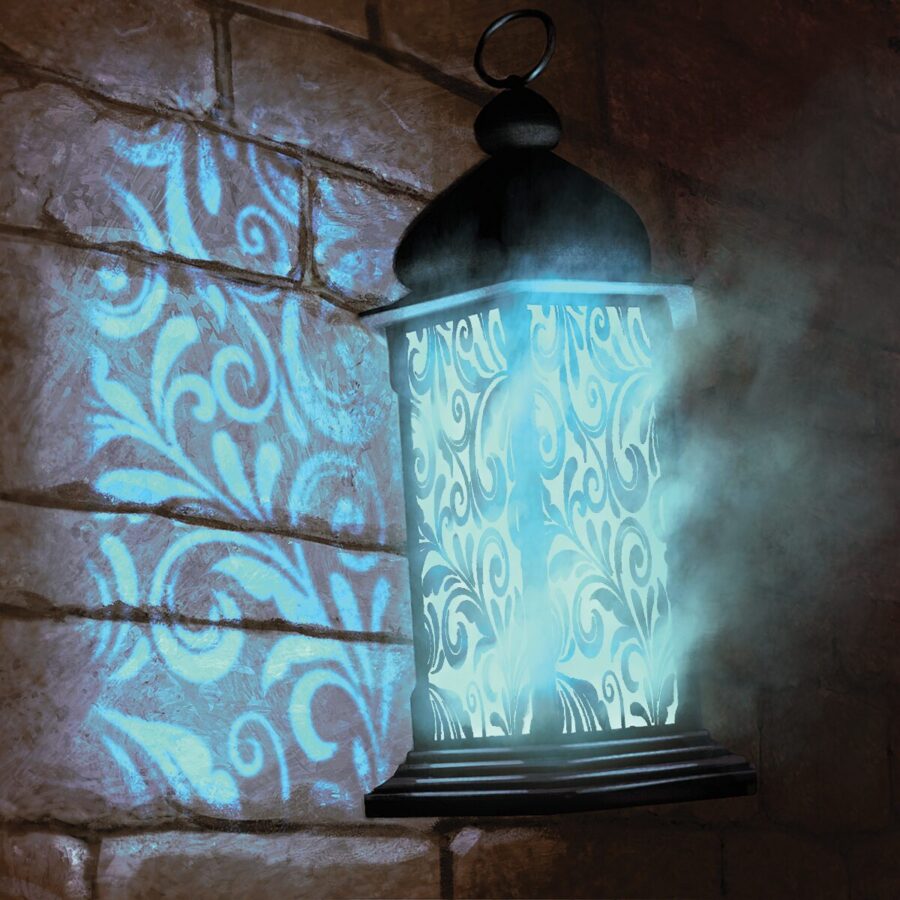
The image of The Holy Church is by digital designer from Pixabay. I played around with the technique more to try and find slightly different vibes in the same style.
The "good enough for a couple of scenes" floorplan of the church is actually the First Baptist Church in Madison, IN. I've warped it a good bit because, again, we are seeing a lot of this through Eustace's eyes. The main requirement was a church with a large ground-floor open area and I got it right in one.
The image of Rest+ Motel is by StockSnap from Pixabay.
Taxonomy and Technical Data
- World: The GLOW
- Campaign: The GLOW
- Arc: 1996 Psychic Eustace Delmont
- Post: Episode 2 - Gathering Supplies
Dates Played: February 2-4, 2025. Though February 2nd was mostly about playing around with the art style.