

I'm going to use some of my more recent materials — by Philip Reed — to try and come up with a fun little adventure. Mostly by tossing a LOT of things at a wall and see what I feel like scraping off.
Category: The Bleak and the Pearl Page 1 of 4
Gryffin must lead his team to confront a group of Nords who have stolen the mantle. However, doing so will almost definitely lead to bloodshed. Is he willing to fight others for this prize? Is he willing to risk the safety of his followers?

In this session, our heroes confront a hungry troll just looking for food and a trio of sea nymphs who just might be interested in something very nearly like revenge. Also featured are large piles of trash and lots of walking. As you do.

Gryffin leads his team back into the sea caverns to continue the search but things almost immediately go wrong once a room with a strange curse enthralls one of the members.


After months, it is finally return to the world of the Bleak + Pearl. What changes will I make (both in story and gameplay) and what sort of expectations do I have bringing this back into a more traditional "Doug Alone" format?
 |
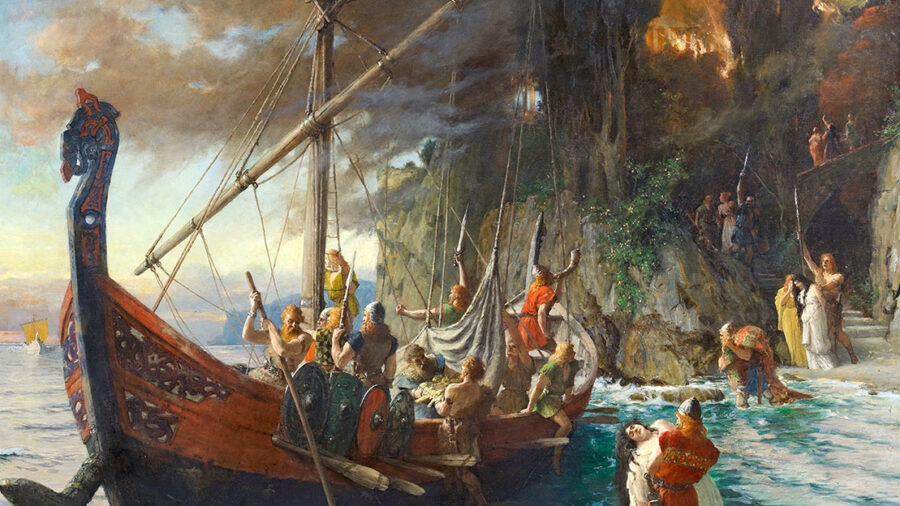
| Original image by IdaT (Pixabay). Alterations by Doug Bolden. |
- "Previously on..." and Campaign Summary
Part 23 Recap - A Few Quick Notes
- The Mantle is Lost
- The Isles of Andrek and the Town of Valthis
- Entering the Sea Caves and the Hall of Murals
- The Hall of Pillars, the Sons' Tomb, Spiders, and Stingbats
- Holy Water, the Sea Wolf Skeleton, and the Tomb of the Seer
- Meeting some Sad Bandits, More Stingbats, and Death
- The Makeshift Ferry, The Haunting, the Longboat, and the Undead Sea Nymph
- Gathering the Treasure, Returning to the Crossbow, Tidal Surges, and Saving Bandits
- Doug's Commentary
- Actual Play Downloads
- Credits
Previously, on The Bleak + The Pearl...
The Blue Delve Boys have returned from the Everburning Forest, exhausted and recovering from injuries. Meanwhile, Gryffin Grunkheart has decided to throw his lot in fully behind Cal and has gathered up a group of unlikely heroes (well, hero-ish). One each from the other four families who, centuries ago, worked with the Grunkhearts to build the original Lighthouse. A strange "ninja turtle" named Boris who consideres Gryffin to be an old-brother-by-way-of-soul has also joined. This group, the "Lighthouse 6" are traveling to the northern most islands of the Gray Channel: Isles of Andrek. One of the fuel stone relics was taken there over 250-years-ago, though the person who took it never returned.
About The Bleak + The Pearl
The Bleak (Barthus) and The Pearl (Silt) are large twin islands. Once home of an Ancient Empire that fueled its machines and miracles by tapping into the primal forces found upon each (Becoming and Being, respectively). Two thousand years after the fall of the Ancients, the Barthic Empire that grew up in its place (one of many over the years) faced its own cataclysm as The Bleak (the corrupted version of Becoming) spread like a disease. Those who stayed were subjected to rapid mutations and strange changes: their own bodies warped into monstrous forms as even the land lost its sanity. The last great project of the Barthic Empire—The Lighthouse—stopped the Bleak from overrunning the city of Grunce. Then its creator, Jonias Grunkheart, disappeared.
Three hundreds later, a decendent of Jonias Grunkheart has gathered a band of unlikely heroes and seeks to train and hone them to protect the future.
Content Warning: Fantasy Violence, Occasional Body Horror.
This post is in RECAP style. See the about page for this blog for more details. The system used to play this is ShadowDark by Kelsey Dionne and the Arcane Library with SoloDark (same) acting as the oracle.
Part 23: In Search of the Harcuram Mantle, Part 1
A Few Quick Notes
Reminder, see Intermission #5 (A { Short | Mid | Longish | Un- } Hiatus from the Mainline Plot) and Intermission #6 (New Icons, Learning Rolls, and Meet the Lighthouse 6) for the speediest catch-up to why this so different from the previous session.
Basically, the four main characters—aka the "Blue Delve Boys"—have a need for a month or two of rest and relaxation and learning/honing some skills. Meanwhile, Cal and Gryffin Grunkheart have formed a kind of Suicide Squad-esque band of misfits from the original five families (plus a fairly literal Ninja Turtle) to try and finish up some quests and to find new allies (and new treasures) to support the cause.
That's the in-universe story. The in-real-life story is I have usually between three and four campaigns going at all times and as much as I love them all, and especially love The Bleak + The Pearl, I need a campaign that allows me to focus on less creative writing, roleplay, complex plots, and complex mechanics. I need a campaign that uses different parts of my brain while giving me the freedom to zone out a tad more. This was the original intended purpose of The Bleak + The Pearl but over time it drifted and crossed over with other campaigns and was losing its distinction pretty hard (while also being a great test bed for a lot of style and element changes). For now, though, I am hard resetting back to its origins. At this point, I am unsure if the series will transition to the old format or not.
The way I am playing this version has five parts:
- (usually) A pre-built dungeon/module [a few fun exceptions will crop up]. Thanks to the way that the majority of Shadowdark dungeons are written, it is kind of easy to play them room by room without much in the way of spoilers. I will make some changes—from fairly slight to fairly large—to the content as written to add in history and elements of the campaign.
- A Google Document where I write a fairly rapid version of my gaming journal. Like all my journals, it will vary from time to time in how much focus is spent but the overall idea is for very few elements to take up more than a paragraph or two (as opposed to others where encounters can take pages of dialogue, tables, and oracles).
- A GIMP file (see the downloads is you want to get an idea how it might work) that has maps locked into place (maps from the pre-generated dungeons in the module), a "fog" layer, a metric ton of labels and tokens (tokens taken from Games-Icon.net from various creators), a torch item to help figure out where to disperse the fog, and then a layer's tab with many notes.
- A Google Slideshow that allows me to keep up with the character sheets in a fairly compact way.
- A copy of Shadowdark with SoloDark.
These recap sessions for The Bleak + The Pearl "Season 2" adventures will make the actual-play-journal a download but they are not exactly complete. Some dice rolls are just summed up instead of written down in detail. Some stuff is actually coded on the GIMP file. Some stuff will change previous sections so the final version reflects the status at the end of a session, not a live look at everything. Especially with the map where doors or tunnels or characters that played a big part might not there in the shared variation because of things that happened.
I am going to call this style "Offline Recap" since the idea is that I am sharing my session's final state but unlike something like The Bloody Hands where you get a pretty flow-readable set of actual play notes that show changes and updates while retaining the original, these are much more Doug's constant working document rather than Doug's pretty showing document.
The Mantle Is Lost
Elude Harcuram spent many years working with Jonias Grunkheart by providing the paperwork and legal services that arose during the construction of the Lighthouse. For this service, Jonias granted Elude one of the fuelstone relics used to start and manage the Lighthouse initially. This was the Elude mantle.
As the years passed, and it became clear there was a flaw in the Lighthouse that would require a miracle to fix, Elude passed on and the new House leader was his son Adren. Adren upheld the legacy of Elude at a fairly steep personal and family cost. Finally, after Jonias disappeared, each of the four families agreed to take the relics and spread them far from Grunce in case someone else was able to finish the Lighthouse. Adren took his father’s mantle north to Isles of Andrek, where the Harcuram House began centuries before moving south.
Adren was searching for the legendary King Skorgald Harcuram’s tomb. He did not return.
The Isles of Andrek and the Town of Valthis
Gryffin Grunkheart (Human Ranger) has gathered five others into the boat The Marius Crossbow. The ship, a galleon-class, belongs to House Marius but has been bequeathed for the personal use of Dhelia "Del" Marius (Human Swashbuckler). Besides Gryff and Del: there is Boris Loo (a Bleak-Touched Chelonian who fancies himself a Ninja), Louis Harcuram (Human Bard), Ronick Mistamere (Dragonborn Pit Fighter), and Ada Bittermold (a Witch of unknown genetic ancestry). Whether demon-kin or Bleak-touched, Ada has deer antlers and deer legs and the ability to talk to plants and mushrooms.
Cal Grunkheart had located a very old map of the Isles of Andrek in the Lighthouse library. This marks the destination Adren Harcuram had in mind but it is essentially 250-years out of date and would not be anything like acurate for the more socio-political aspects. Still, this enables Gryffin and Del to plot a course to be near the sea caves where Skorgald should be buried.
The Crossbow sails within a few miles of the farming hold of Valthis. In the spring (which it currently is) and summer, the village dedicates itself to sheep and vegetable growing. In the fall and winter, though, the fighting men and women are sent south on raids to plunder and claim. It is led by Signe. She has been troubled by a would-be Jarl Karsgald from a nearby island who—besides once betraying Signe during a raid—is slowly moving towards declaring himself Jarl over all of Andrek. Egrid, Signe's Seer, has had visions that unless he is stopped, Karsgald will bring ruin to the whole area.
Hearing reports of possible warriors from the south, Signe is intrigued. Here could be allies to join her cause or, if enemies, someone worth stopping before they aid Karsgald. She has a longboat sent out to hail the newcomers and invte them to Valthis. Gryffin accepts this offer and heads towards Valthis bringing only Ada along. Ada's appearance as a friendly young woman with deer-antlers fits his stereotype of what he hopes their stereotype might be of some sort of truthbringer. The fact that she can be a bit weird should only add to the intrigue. The plan works and both Signe and Egrid take to Ada and Gryffin.
Hearing Signe's plea, Gryffin gets swept up in the story—very swept up—and agrees to take Egrid's oath to Odin that he will defeat Karsgald. Just, first he needs to see to the mantle. Signe laughs at this. Surely having her on his side with her 200 warriors would be better than any piece of cloth. (Gryffin does not explain that this is not a piece of cloth but more like a fuelstone carving of a mantle meant to fit upon the statue of Elude Harcarum.)
He explains that his people are new to the fight but capable of great deeds. He just needs to spend some time letting them work together and finding their new potential. Signe actually appreciate this: a leader guiding his men on a quest. She accepts that it will likely be some time before they are ready to face Karsgald but she holds him to the oath. The others are brought in off the Crossbow. They have a feast that night and gather some information before heading out the next day.
DOUG's NOTE: The Marius Crossbow definitely has some crew on-board. However, rather than dealing with any kind of system where I roll encounters and such while the crew is left behind, I basically only roll encounter checks and the like if one of the main characters is on it. The rest of the time it is considered something like auto-pilot. Over time, this might change to where the crew has their own character sheets and show up on some expeditions. I just wanted to get the Lighthouse 6 established, first.
Entering the Sea Caves and the Hall of Murals
The Crossbow continues along the coast going towards where the map says the sea caves should be found. Del locate them after a few hours of sailing through driving winds. They spend a couple of hours exploring the exterior and realize that there are several entrances to the caves where water flows through (in and out, depending on the tides). After some consideration, Gryffin opts for the northern side which allows them to slightly hide the Marius Crossbrow and gives them some cover for their launch craft.
They follow the narrow tidal channel deeper into the caves until they come out into a dverg-made structure. At one time in the past, these gnome-kin craftsfolk built a suitable tomb for Skorlgald and his fellow Sea Wolves.
The tidal channel splits this initial large chamber into two and Gryffin always heads to the right-hand side first so they head over to the west.
The first site of interest they find is a place of sacrifice and a hall of murals. In the former, a bowl meant to collect blood is in a large altar. In the latter, three murals of the Nordic gods are in each their own alcove. Ada recognizes the dried blood is some humanoid—in Barthic Tongue, "human" includes humans, dwarves, elves, and goblins at least so can be confusing without context—so Gryffin has the team enter into battle readiness as they head up into the hall.
It is Ronick who realizes the relationship between the altar and the murals. His family has embodied the concept of sacrificing their body to pledge allegiance to strength. He pours his dragonborn blood into the altar bowl and then approaches Odin—they only have a vague idea of what these figures represent—so they choose a mural more or less at random. Three others join in. Gryffin chooses Loki. Del also chooses Loki. Boris chooses Odin. Louis prefers to not damage himself and so refrains. Ada is dedicated to the Willowman and will not pledge herself to another god. All those who completed the sacrifice feel just a bit stronger in various ways.
On the way back out of the hall, Gryffin spots a zombie who has shown up, attracted to the blood. Gryffin pulls forth his longbow and scores a precise shot, dropping the zombie in a single hit.
Proud of themselves, they head back into the main branch and next head to the Hall of Pillars.
The Hall of Pillars, the Sons' Tomb, Spiders, and Stingbats
Entering into a hall of four large pillars, they carvings of short, beared men hammering stone. The group does not much about the dverg history though they heard the name mentioned back in Valthis. To the north of the room is a door with carved runes in the Nord-style. Unfortunately, no one is able to read them. Not even Louis, who knows dwarvish runes. Gryffin pushes the door open, anyhow.
They find a series of alcoves with five Nords in stone coffins. Each coffin is left uncovered and the bodies inside have been decapitated and turned upside down. The group does not fully appreciate the symbolism of this act. What Gryffin does appreciate is the fact that these coffins are covered in large spider webs. He calls for the others to retreat but as he does a giant spider falls down upon him. He gets his shield up to block the hit. Four of the others back out of the narrow tomb but Ronick runs in and brings his greatsword down to finish off the spider.
The threat out of the way, they each take one of the five tombs and search to see if they see any sign of the mantle. They do not. They do, however, find a signet ring with the crest of the Skorgald can. Louis recognizes it as an old symbol for the Harcuram's before they settled down in Grunce. He pockets the signet ring.
Moving south, the party is pushing through a door on the other side of the pillared hall when a pair of stingbats attacks Ada and Boris in the back row. Even as Boris manages to fend off the attack, Ada is struck and knocked unconscious as the stingbat starts to feed off of her. Del leaps onto Ada and cuts the stingbat down but the deer-antlered witch is unconscious and fading fast. Gryffin struggles but manages to make a healing concoction and pour it into Ada's mouth which revives her enough that they get her stabilized.
A bit shaken, Louis stops and sings a song to raise everyone's spirit.
Holy Water, the Sea Wolf Skeleton, and the Tomb of the Seer
The next room they enter is a large chamber with the western walls taken up by an elaborate series of high-relief carvings. Six warriors raise their swords towards a holy woman. The holy woman has her hands cupped and full of water. Ada sniffs it and realizes it has some holy blessing upon it—something of which is not the biggest fan—but she still takes the bottle that Gryffin had used earlier to save her life and fills it with water from the cupped hands. She pockets it and figures she will use it at some later time.
To the south, the dverg-carved tomb gives way to a natural cave. To the east, someone has piled rubble and trash to block a door. Gryffin decides to clear that while he sends Boris and Del to give watch on the cave. After the stingbat attack, the group is more aware of the potential for surprise attacks.
Finally getting through the rubble, Gryffin takes Ronick, Ada, and Louis with him into the next area. This is another tomb but these corpses are shown much more honor. The skeletal remains of six warriors hold great axes while their eyes are adorned with gold coins. Three of the group refrain from disturbing the corpses just yet but Ronick is not afraid of a potential haunting. He reaches over and grabs the coins from the nearest skeleton, which rises up and starts slashing at Ronick with an axe. Gryffin screams to put the coin back but Ronick laughs off the threat and manages to smash the skeleton to bits. The dragonborn pockets the coins and says he might take more.
Gryffin squares off and the first true test of his leadership takes place. After a few minutes, Ronick concedes to follow Gryffin's orders and leaves the other tombs alone.
While this is going on, Ada has been poking the walls around the tombs and is surprised to find a secret door. It opens and the four go further north into it.
The find a monument to a seer of old. Louis actually sort of recognizes her from the family history he found, but cannot place a name. A statue of her holds a golden wand with dwarven runes reading "Welcome" upon it. Ada, after looking at the others, takes the wand. She can sense it has some magic but not exactly what. The statue luckily does not come to life. Gryffin tells them to not bother the tomb any further—especially because of the warning to not mess with a woman's corpse in these caves. This time, the unruly bunch listen and follow him out.
Meeting some Sad Bandits, More Stingbats, and Death
Going south into the cave, they run into a group of six sad bandits. The chamber the bandits are camping in is another large room once again split in half by one of the tidal channels. The bandits are on the south shore. The heroes are on the north.
Once again, Gryffin immediately greets the strangers, this time with Louis joining in. The bandits are more curious than hostile. Both groups share first names and Gryffin asks about the mantle in a fairly roundabout way, trying to hide its real value. The bandits know not a whole lot about it. Their leader saw it in the cave and went to look for it and other treasures, taking their boat, but has never returned. This has effectively stranded them inside.
While the conversation is taking place, a larger group of stingbats flies into the south side of the room and starts attacking the bandits. The heroes shoot arrows—and Boris uses his long razor chain—to give support. Before the stingbats can be killed, the currently acting leader of the Bandits, Thurgston, is struck and killed. The rest of the stingbats are beaten but this breaks the spirits fully of the sad bandits. Trapped in a cave killing them off one by one, there only hope would be to risk swimming out through the tidal channel.
Gryffin offers to come back in some hours and get them out but he needs to keep looking for the mantle. He tells them to stay alert and stay calm.
The Makeshift Ferry, The Haunting, the Longboat, and the Undead Sea Nymph
Heading north, two things occur. First: the group realizes that they are being followed by a green glowing ghost. Second: they find another tidal channel blocking their path and a makeshift raft—possibly the bandits'—caught up against some rocks and partially submerged by the water flow.
The ghost does not attack, just floats nearby, and seems as though it is more curious than hostile. Gryffin wonders if their attempt to save the bandits called up this Nord spirit who sees them as fellow heroes. He asks the others to leave it alone.
Boris pulls the raft free but it would be hard to get it out of the water and back down the cave to the bandits. Besides, they have a need for it. Using Ronick's rope and grappling hook, they set up a makeshift ferry. This way they can cross back and forth over the channel. They do this and continue north. The ghost follows them.
The next room they find is another large dverg-made tomb. In fact, it is the eastern half of the very first chamber they entered through. Unlike the previous one, which was mostly a hall, this one houses Skorgald's longboat. The massive ship was truly the vesself of a king and sits upon stands with the Skorgald/Harucam drake symbol in carved into its side and masthead. Jonias brings Louis and enters the vessel while the others wait outside and keep guard.
Inside, he finds the body of an old woman and once again does not interfere despite her having several valuable jewels and pieces on her mummified (not skeletal) body. As he leaves, the ghost that has been following hovers nearby and seems pleased they left this particular tomb alone.
Passing along the side of the longboat, they see the caves go south next to a large indoor lake. Taking this path, they come near the slain body of a sea nymph. Trying to stay some distance from her (Gryffin is very punctual about listening to that particular rumor), they still get too close. She rises as an undead nymph and attacks Gryffin. In the process of defending themselves, they have to cut her down (hiding the fact of what caused her death, a group of nords also in the caves at the same time).
South of there they find a dead end but can just make out an old door with more dverg-runes: "Wisdom is the key that will open the way." Louis brings up the wand that Ada took and she takes it out and waves it at the door. Then looks for a place to put it into the door itself. Finally, she taps it against the door and it opens up. She wanders inside and the group finds a massive trove of treasure. Massive by their standards.
Gathering the Treasure, Returning to the Crossbow, Tidal Surges, and Saving Bandits
Since part of his mission is to acquire funds for the rebuilding of the Lighthouse, Gryffin is only momentarily disappointed that this trove does not have the mantel. He goes into practical mode. They can take this and make their way back to the longboat room. Their boat is there—Borish had previously used his own grappling hook to pull it over to the easter bank where they can access it without having to backtrack—and Del can take the boat by herself back to the crossbow. Then come back and get them and they will head out for the night, find a way to save the bandits, and rest before returning the next day.
On the way back, they only run into a single stingbat—Gryffin shoots it—near the body of the sea nymph. They load up the boat and send Del off. Unfortunately, near disaster strikes shortly after.
A tidal surge causes the channel to overflow and wash everyone back before the water then sucks back into the channel. Del was too seasoned to be caught off guard but had to spend a bit mooring to the walls. The others mostly resist but Boris is swept into the channel. Luckily, the chelonian is naturally ok with water and a trained ninja. He smokesteps back onto the shore while others are calling out his name (the damage he took from being knocked over and pulled into the water took a lot out of him, though).
Del returns an hour or so later and the group heads back to the Crossbow. Gryffin works out a path to get to the bandits and picks the remaining five up. He can tell that though they are grateful, they have a certain glint in their eye and so does not trust them staying too long upon the Crossbow. Del pilots the ship a few miles east of the sea caves, opposite of where Valthis is, and they drop them off with some food and supplies.
The Crossbow crew rests for the night and gets ready to return to the caves in the morning. Over night, the strong winds die down finally.
Maps at the End of Part 23
 |
| Hex Map originally by Kelsey Dionne and Cameron Maas. Tokens by Delapouite of game-icons.net. Colors and labels by Doug Bolden. |
 |
| Click to enlarge (etc) to see better the details recorded for this session. Map by Kelsey Dionne. Tokens by various contributors from game-icons.net. Colors and labels by Doug Bolden. See credits for more information. |
DOUG'S COMMENTS AND NOTES
This represents roughly four to five hours of playtime with the caveat that some of that time (surprisingly little, but definitely an amount) was spent making some tokens, figuring out some graphic techniques, and just generally enjoying the aesthetic aspects of my creation.
I wonder how many blog posts this would be if I kept it in the previous method. I would guess at least three, pushing four. Of course, this means scenes like the one with Signe (and possibly the one with the bandits) would have a lot more dialogue and character building. I think it is an ok trade. Some of my other series will have an entire chapter of dialogue. It gives me some different vibes and mindspaces.
Here are some some various things I noted during and after the session.
SYSTEM OF DAYS | MONTHS IS NEEDED. I have been highly inconsistent with time keeping on a longer scale throughout this campaign. I think it has gone back and forth between spring-ish, summer-ish, and autumn-ish a few times in the past couple of IRL months. For now, just to set a time and start keeping track of it, Barthus is currently in LATE SUMMER SPRING MONTH (FECK, I got this wrong...Winter would start with Longnight, not end. Whoops, I'll correct it next session, but this session being days 21 through 23 of Late Spring Month). I haven't a good name for the year but let's call it Crossing 301 being the 301st year since the Barthic Empire officially moved across the channel (and collapsed on the other side). The idea I am thinking is you have Spring starting [not ending which is the mistake I made during the session] on Vernal Equinox. Summer starting on Longday (Summer Solstice). Autumn starting on Autumnal Equinox. and Winter starting on Longnight (Winter Solstice). My current idea is to name the months after trees (probably using some naming generator but essentially being the equivalent of real world trees). Spring would be flowering trees. Summer will be fruit trees. Autumn will be trees with bright autumn foliage. Winter will be evergreens. After winter will be Thorn which will be a 5 day period of celebration and ghost stories leading back into Spring.
RUNES CONFUSION. When we got to the "Hall of Pillars," I took "runes" to be Nordic runes [which is correct, probably]. I rolled to see if this had been studied and got no so the characters had no idea what the runs meant on the door or on the Wand of Wisdom. When I got to the door which uses the Wand of Wisdom to open, the game text says "Dwarven Runes" (presumably Dvergen Runes). Because of this, I swapped and thought that all the runes were by the dverg builders. However, that is inconsistent with other world building in Cursed Scrolls #3. That led me to making it a bit easier than it should be to figure out that door. It was a lot of treasure, relatively speaking, but I won't sweat it too much. Had I been running this for players besides myself I would have made the same mistake and deep down having a few hundred gold pieces to blow on carousing won't run much immersion for me. The gentlest retcon is the wand and door are both dwarven but any others are Nord.
COMBAT and TORCH TIMING. I realized in the middle of this session that I had screwed up combat timing for a minute (no pun intended). Since the shift to theater-of-mind occurred, I have been very loose on timings. I slipped back to the old Dungeons & Dragons habit of treating combat as shorter round inside of the longer timing of the non-combat game. Shadowdark is "real time"—which gets trickier in solo play—but really I should have been keeping that consistent this whole time. I had to make a mental correction now that I am back to the old school style of dungeon crawling. ON THE OTHER HAND, I have been using the SoloDark recommended 10-rounds=1-Torch metric. I think I might up that to 12-rounds. Maybe. That would better match roughly an hour's-worth of gameplay to a single torch.
Going Back to Downloads for This Series
This campaign is not only going back to its original style of solo play but so are the blog entries for it. As I said above, my notes for this style of playthrough are much more a working document meets technical log than the kind of frilly back and forth style of my usual write-ups (which are like a slightly rougher blog post with a lot of asides).
In other words, I will once again share some of the maps and text notes as downloads instead of trying to format them into a blog-first-like presentation. This way people get to see a fuller take on my various play methods.
Actual Play Downloads
NOTE: the actual play document contains material that is not mine with a lot of material that is. Direct passages from Cursed Scroll #3 has been copy and pasted [usually in a player-facing way]. The maps come from that document with colors and labels added. The tokens used for characters, mobs, and features are taken from games-icon.net and various contributors. See Credits for more details. Just note that downloading these files does not grant any additional permissions to use the parts not original to myself.
I plan to fix this better in the future with credits baked right into the documents but these files were made without it and it would take a lot of time to start editing it in now. I apologize in advance. I try to be big on giving credit, here.
- PDF version of "2.1 Searching for the Mantle, SESSION 1"
Notes pretty much as I wrote them while playing representing the "final state" of the session (some things might have changed and updated, but those details are lost to time like a WordPerfect file on a 3.5" floppy). - XCF (GIMP): "Isles of Andrik Hex Map SESSION 1"
Not a lot happened on the hex map but just in case you want to see the very basic set-up. - XCF (GIMP): "Sea Caves and Tombs with Colors SESSION 1."
If ever wanted to see the kind of steps you might take to turn the GIMP interface into a personal VTT, this is probably the file.
I should probably do a fuller write up of that last one.
CREDITS
This campaign is played using Shadowdark and the solo rules from SoloDark. Both are by Kelsey Dionne with various others contributing art, etc.
This session is played using materials from Cursed Scroll #3: Midnight Sun including the Sea Caves map used for the main adventure, the text from the "Hoard of the Sea Wolf King" adventure, and the Isles of Andrek used for the hex crawl. "The Hoard of the Sea Wolf King" and all maps used in it are by Kelsey Dionne. Used here for personal use. The hex crawl, including Valthis (etc), are also creations of Kelsey. The hex map cartography is by Cameron Maas.
All references to The Bleak, The Lightouse, Grunkheart, Grunce, Harcuram, and other stuff more directly related to the campaign are by me, Doug Bolden, and are a byproduct of months of playing. Those elements are free-to-use if you want. I honestly do not mind.
I have used GIMP to add colors and notes to the player-facing maps. I still do not own the maps. Be good, please. Better yet, get your own copies from the Arcane Library. They are a good company and this is a great game.
The tokens used in the map are from game-icons.net and were provided by that website for use under Creative Commons CC-BY License 3.0. Contributors used include Carl Olsen, Cathelineau, DarkZaitzev, Delapouite, GamerAce135, Lorc.
The image used to make the splash art is "Waves, Beach, Norway" by IdaT provided under the Pixabay License. As usual for Shadowdark themed posts, I use GIMP to reduce the image down into two-colors and then pick some pleasing-to-me combination. Intended as flavor rather than a precise representation.
The images of the maps from this session were created by myself using GIMP and a mixture of the above resources. Shared here only as demonstration.
Intermission #6 Contents
- Trying out a New Token Paradigm
- Re-Introducing the Blue Delve Boys and Learning Rolls
- Background for the Lighthouse 6
- Meet the Lighthouse 6
- The Potential Others
Trying Out a New Token Paradigm
In previous The Bleak + The Pearl Intermission (#5) I talked about taking the main storyline and putting it on a semi-hiatus as a way to focus on some new characters, get back to a purer dungeon delving experience, and just slightly rest up from what had been a kind of intense story building learning experience. This week's post will combine some of the progress on that as I plan to (next week) launch into the first of these new delves.
A slightly minor aspect to this hiatus and soft- | hard- relaunch is that I wanted to go back to the days where I was using a homebrew virtual table top setup to explore the dungeon mixed with hand-rolled dice and both virtual and handwritten notes. While looking over my assets for this, I found a stack of tokens I had made using John Kapsalis art originally designed for or around Advanced Fighting Fantasy and while I love JK's art and look forward to using it again in any AFF endeavors into which I might dive, I also wanted to give a good strong think about the aesthetics of this new era.
To remind you, this is what my original set up looked like.
 |
| The Blue Delve Boys face off against a berserker cultist and three zombies. (Art by John Kapsalis, Dyson Logos, and Crypto Cartographer - arranged by Doug Bolden - used here for personal use but all rights are reserved by original creators). |
Dyson Logos (or other) map, JK art, a GIMP template using some token borders I found (after digging through my files, I am 98% sure I was using "Character Token Portrait Frames for VTT" by Crypto Cartographer at least as base), and then a few other pieces here or there. Monsters were freqently "close enough" selections. Characters were "close enough" with some matching more than others. I would use text boxes to mark changes on the map and would often use a fog layer to update the map as I went to show explored areas and such. Over time, it made a nice digital artifact. You can see an example at the top of my recap for the "The Lost Citadel of the Scarlet Minotaur" dungeon.
There are a couple of problems with the set-up that are not quite actual problem. The two biggest (outside of a potential rights thing and tracking down credits for multiple sources every screenshot I might share) are that the characters/monsters never quite fit my mental vision and each token tended to involve a multistep process. I had to dig through my dozens of JK token packs, find the one I wanted. Snip it out from the whole. Import it into GIMP. Possibly trim or mask out portions of it to make it pop out better. Pick a frame fitting whatever mood or need I felt worked best. Export that out into a PNG. Upload that into my VTT. Then, when another encounter would show up, either reuse a "close enough" token or start back over.
As I have explored more and more with tools and aids that I like, one thing I have come to use a lot for some of my element is the CC-BY 3.0 tokens/icons at games-icons.net. It takes a little bit of practice to get used to what tokens are or are not there. As you get used to their selection, though, you start to get generate some ideas about how you could creatively add them in. At least I do.
This lead me to a new sort of idea. Find some broad "iconic representations" of the characters—Grusk can be represented by his axe, Bloodlust, while Tom might be lockpicks—and then use the icon customize option to add in a few colors, cut a few pieces out, and generally make icons not really meant to be precise tokens to the characters but stand-in elements that allow me to keep up my own mental map of the characters while also being clear enough that I am not confused about who is who. For monsters, a few basic icons can do heavy lifting: basic corporeal undead types, insect types, cultist types, spirit types, demon types, etc. Then when I come across a gnoll I do not have to find a gnoll token that is roughly the right shape and equipment but instead I use the mid-level humanoid beastman generic token. Save the tokens in such a way that I keep the symbol name, the artist, and the rough representation in the file type.
Here is what the above scene would look like using these more generic tokens. I'll add in a "web spell" effect and a few more enemies to demonstrate.
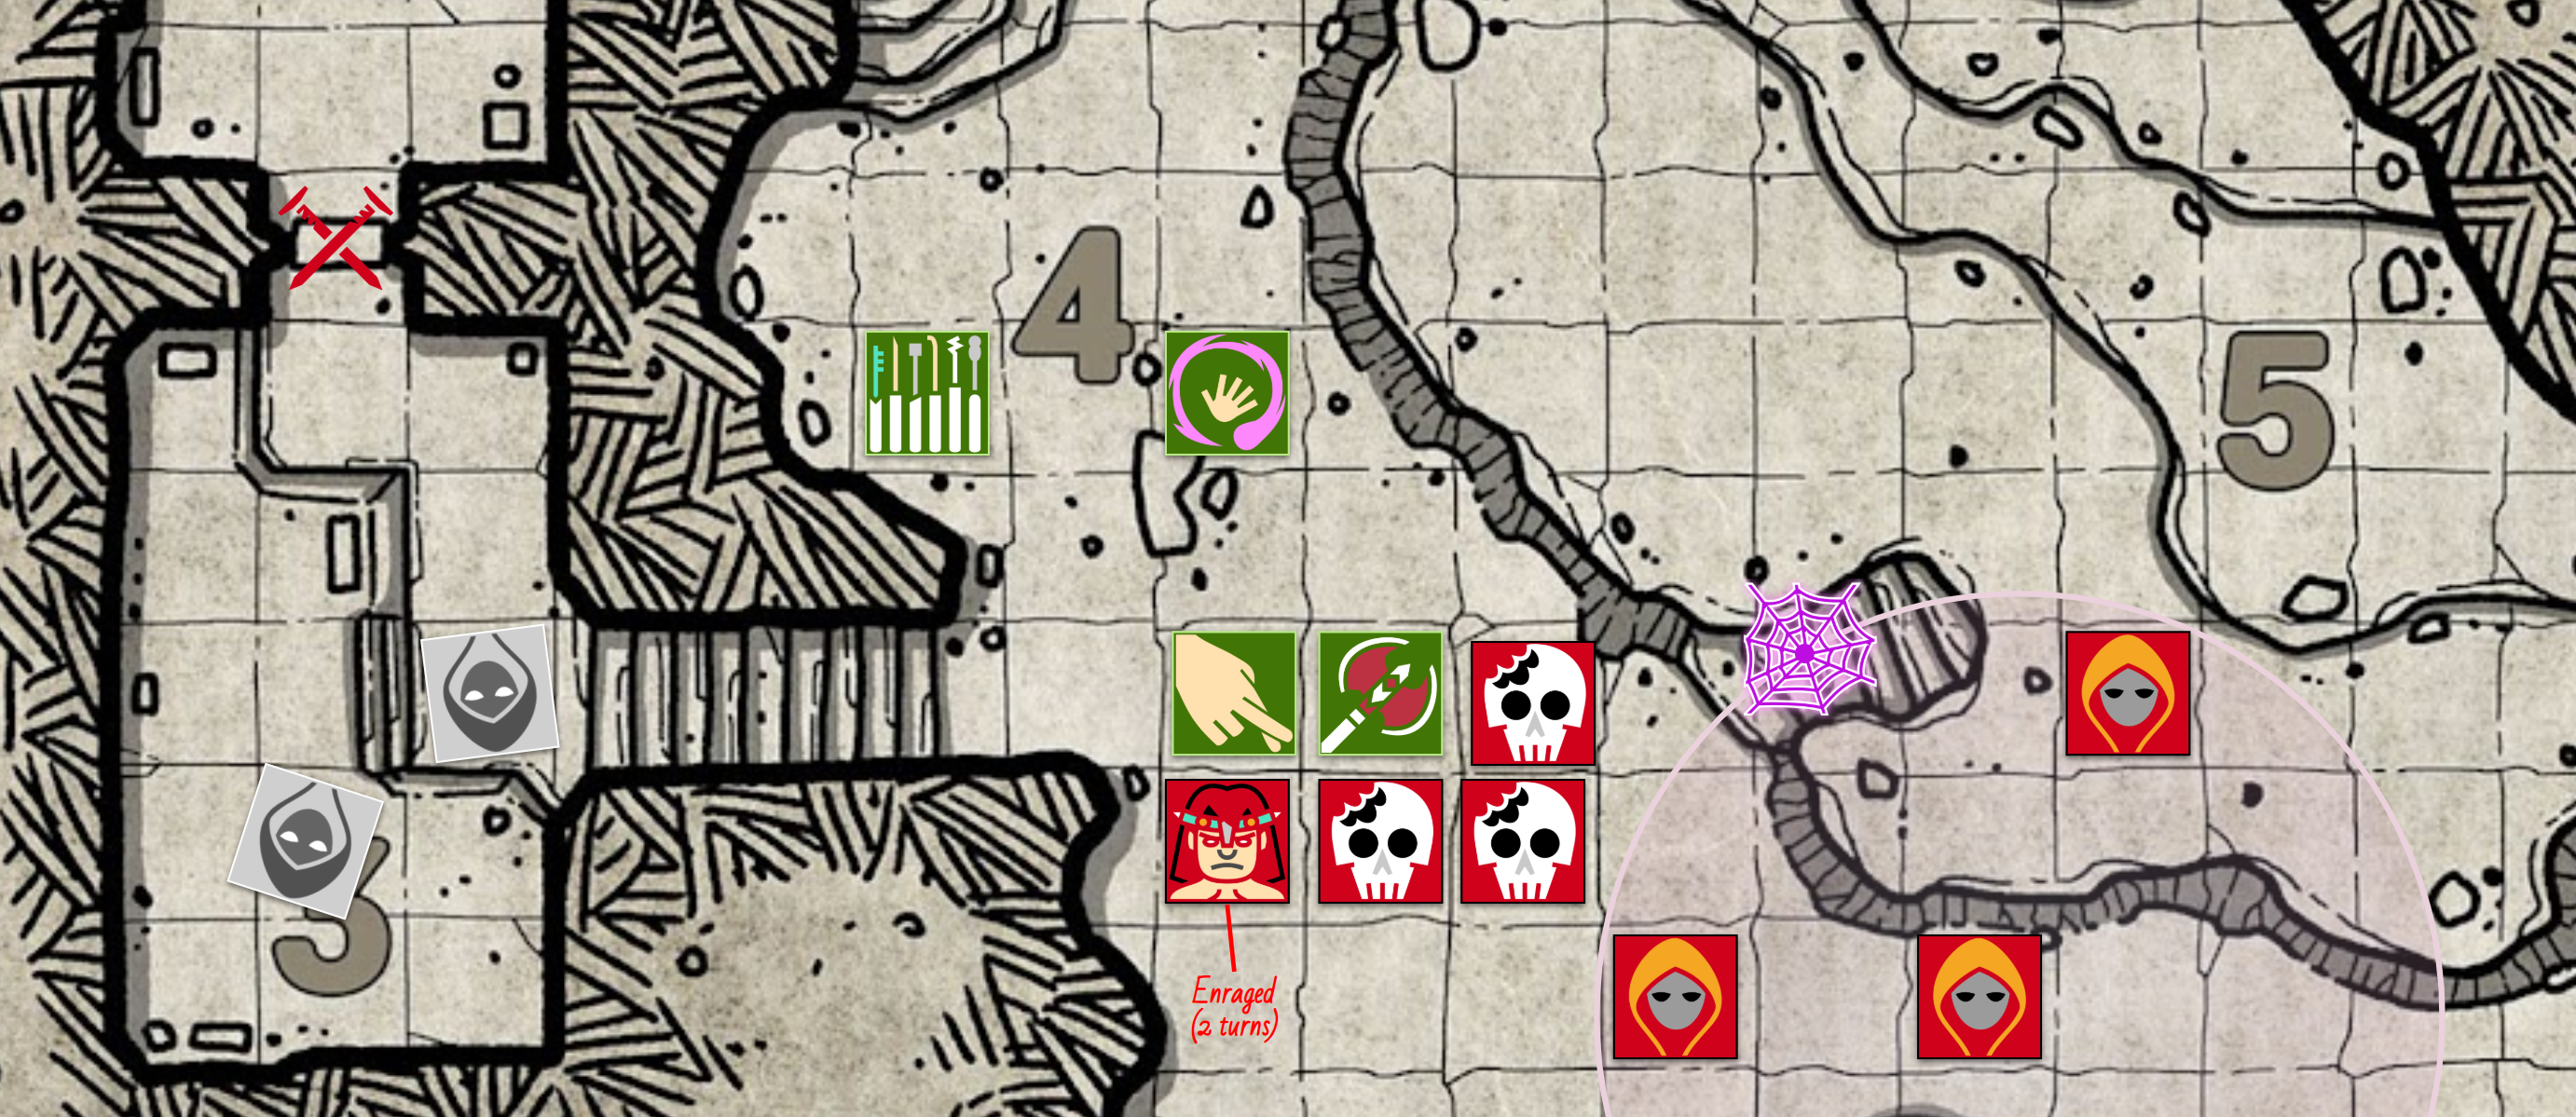 |
| Three zombies attack Grusk while an enraged berserker cultist attacks Inar. Three other cultists are being trapped in Rance's Web spell. Two dead cultists are in the previous room. (Map by Dyson Logos. Icons by Delapouite, Lorc, and GamerAce135 from games-icon.net [CC-BY 3.0]) |
While the old art definitely had its charm, I really like the "board-game aesthetic" of the new art. I also like how it frees me from trying to describe a scene with my token choices and instead gives me more freedom to represent a scene and encourages a bit of creativity with colors and themes. I also like adding the spell effects and such to better track the status of things, backed up by some text.
Re-Introducing the Blue Delve Boys and Learning Rolls
In that light, here are the Blue Delve Boys and their current tokens. These might change over time depending on factors but for now, here's what they look like.

As I was making up icons and working on the "Lighthouse 8" (see below) I came across a line in the Kelsey-made Bard write-up: "Add 1d6 to your learning rolls." I realized I did not know what that meant. I found out that I had been missing a whole mechanic that is exactly the sort of reason why I like to play Shadowdark. As I said in a recent post, Shadowdark tends to allow characters to have more fiction than other OSR and OSR-adjacent games. "Learning" is precisely what I am talking about. While the Carousing rules got a fair amount of discussion during the build up to SD's release, I found that I had overlooked it's first cousin. Instead, you can have your character attempt to learn a new skill or general knowledge during downtime instead. It is described as such on Page 91: "Learning enables you to do new actions or gives you advantage on certain checks." You work out what you want to learn and can learn with the GM, then start out making a INT DC18 check. The next time you try to learn it, you reduce that by one step—i.e., DC15, DC12, DC9, etc—until you learn it or give up trying.
Over the course of these months of adventure, there have been a fair amount of downtimes. If I was playing a more traditional campaign, maybe four-ish. With the more story-heavy style campaign, maybe eight-ish. I will cut that into the middle and say six downtimes for six months of playing. Maybe high, maybe low. I don't know. It's complicated.
There were two carousing checks. This leaves four attempts to learn.
Grusk and Tom are going to want to learn Bleak navigation for sure. Then, if they pass that, then Grusk would want to learn more about delving while Tom would learn hunting. Inar will first try for first aid. After that, he will try for sneaking around. It is not really allowed for him to learn the full thief ability kit but since halflings have a natural sneak and he is prone to trying to stay a bit back to help once people get injured, I figure this is kind of a extending of what he can already do [and I have never really used his halfing invisibility properly except maybe once]. Finally, Rance will definitely start out learning the Ancient language. After that, he will work on improving his "monster lore" abilities since he seems to have that inherent based on how I play. Finally, he will being working on learning how to operate and repair automatons based on Jonias's notes.
Let's see how this goes...
Making the Rolls and the Outcomes
Grusk, learning Bleak Survival (at -1 to INT): 7 vs DC18, 6 vs DC15, 13 vs DC12. Grusk (on the third attempt) gets Bleak Survival and advantages to rolls related to navigating and surviving the Bleak, including a broad sense of what level of Bleak they at.
Grusk, learning "Delving" (at -1 to INT): 9 vs DC18. Not yet, but he will continue.
Tom, learning Bleak Survival (at -2 to INT): 13 vs DC18, 3 vs DC 15, 3 vs DC 12, 10 vs DC9. Tom (on fourth attempt) gets Bleak Survival with the same as Grusk. No time to learn Hunting just yet, but that'll be next.
Inar, learning First Aid (at +1 to INT): 19 vs DC18. He gets it on first attempt. He will get ADV to first aid rolls while trying to stabilize others. I'll also say this can be used to generally do things like identify wounds, give a rough prognosis, identify poisons/diseases he might have some experience with. Generally the kind of stuff that might be helpful in a non-magical, non-specialized way.
Inar, learning Sneaking (at +1 to INT): 13 vs DC18, 9 vs DC15, 11 vs DC12. Next time he will be against DC9.
Rance, learning Ancient Language (at +3 to INT): 15 vs DC18. 20(!) vs DC15. Rance not only learns Ancient on his second attempt but we'll say he is good at it and gets ADV to reading Ancient Text.
Rance, improving Monster Lore (at +3 to INT): 14 vs DC18. 19 vs DC15. His final learning attempt nets him ADV to identifying monsters and will allow him to make deductions about Bleak altered creatures. He will next turn to using his Ancient Language skills to translating Jonias's notes about the automatons.
Background for the Lighthouse 6
Behind the scenes, I created the initial four heroes while learning Shadowdark and only spent a somewhat short while making them. I gave them only a thin backstory—they were in The Pearl, they were orphans raised at a monastery (which got the name "The Blue Delve" from somewhere, probably some random table), and one of them had nightmarish dreams of something going on in the Bleak—that picked up elements like a snowball rolling downhill. They quickly became the reason for the campaign and so had developed a kind of necessary plot armor. If one of them died, it would sort of be weird to continue the campaign as it was going. Part of the reason for the reset is to build up some other characters, personalities, explore some extended materials, and effectively remove the plot armor a bit. Things can get more tense as it goes.
In terms of The Bleak + The Pearl's world: 300-years ago, Jonias Grunkheart enlisted the lords and ladies of the four other Grunce leading families to enact an incomplete version of a great plan. This is the Lighthouse, a rebuilt Ancient technology that takes the energy of The Bleak and uses it against itself to push it back (while generating both visible light and also The Light, the neutral energy power source of all Ancient technology).
The Grunkhearts provided the technology and planning. The Mariuses provided materials and wealth from their shipping. The Bittermolds provided magical assistance and expertise on darker truths. The Harcurams provided legal and administrative support. The Mistameres provided physical strength to build the Lighthouse and protection for the workers constructing it.
After the Lighthouse was completed, and the Monolith carved underneath (more a monolith symbolically, implying all the people of Barthus were one), the families continued to rule Grunce (the Grunkheart family estate, semantically decayed from "The Grunkhearts' Land"). Other people from all over Grunce filled the city to the brim and other great houses from other cities were not content to be left out. Various power struggles occurred while the Lighthouse went from being well known technology to something increasingly forgotten, a background artifact shining light into the distance. The Grunkhearts remain with some power but other families have virtually pushed them out. Cal Grunkheart, nephew to the current ruler of the House, has taken on the goal of fixing and expanding the Lighthouse. The Mariuses have done marginally better but have given up their seafaring ways, focusing entirely on money trading. The Mistameres lost their family land and combined as a family with the Harcurams for form House Mysturam. And the strange, weird Bittermold House retreated into the Bleak and have largely vanished besides various small manors and estates all laying claim to the name.
[Doug's Note: Mistamere is a reference to the Frank Mentzer created dungeon found in the red box Basic Dungeons & Dragons because running that adventure was the first time I ever played a tabletop RPG and I thought it might be fun to convert to Shadowdark. The name remains Mentzer's though this family is quite different. Bittermold as a family name is a reference to Cursed Scroll #1 and was created by Kelsey Dionne. Unlike Mistamere which is 99% an original creation with a naming-shout-out, the Bittermolds are more directly influenced by their source and will soon show up when that module is run.]
Meet the Lighthouse 6
As our heroes have been risking it all to support Cal Grunkheart and the Lighthouse Keepers, Cal has come up with the plan of tasking his cousin Gryffin Grunkheart (possible future Lord Grunkheart) with gathering up members of each of the other five families to begin reclaiming Grunce and protecting the future of Barthus. Possibly even pushing The Bleak back and retaking the land.

The leader of the Lighthouse 6 is Gryffin Grunkheart, the middle son of Lady Moreena Grunkheart (and technically third in line of succession, including his mother). His family protests him entering The Bleak since this precludes him from fathering heirs but he considers Cal to be the true Grunkheart lineage. Served for time as a minor captain of the city guard before aggreeing to help the Blue Delve Boys to deliver an anti-magic cloak to The Pearl. Here he met Boris Loo and decided to dedicate his life to adventure. He is a Human Ranger. His shares the Grunkheart symbol of a Lighthouse as his personal crest with Cal. He is a loyal leader and often will risk his own safety to protect his crew.
[Doug's Note: Rangers were developed by Kelsey Dionne and released along with the Bard as a special supplement. Speaking of...]
Louis Harcuram is one of the few "true Harcurams" left. His branch of the family is much poorer and he was raised a fisherman before taking up performing and traveling as a minstrel. In the Sofron Desert, he met Ronick Mistamere and enjoyed the irony of partnering with a Mistamere due to the long family association. When he and Ronick received the call to join with Gryffin, they both took the chance and headed to Grunce. He is a Human Bard and his symbol is a lyre.
Ronick Mistamere is a Dragonborn Pit Fighter. Not all Mistameres agreed with the plan to merge and settle down running warehouses and stores. Those went west into the desert where they took any chance they could to reclaim the militant might of the Mistameres of old. Ronick's branch combined themselves with desert dragons and attempted to lay claim to the desert. Beaten, they instead settled for being mercenaries and pit fighters. Ronick's great strength and fearsome appearance (with bronze and lapis lazuli scales) earned him a fierce reputation, which was enhanced by Louis acting as hype man. The two are great friends and both look forward to working with Gryffin. His symbol is the skull of one of his desert dragon kin.
[Doug's Note: "Dragonborn ancestry" in this case is derived from Unatural Selection with breath (and electricity immunity) from the desert dragon as given in Shadowdark, itself. Pit Fighters are from Cursed Scrolls #2.]

Dhelia "Del" Marius is the maybe-mad descendent of infamous Mad Del Marius. While the Marius family has officially given up the family tradition of sailing the high seas, this new Del has reclaimed it in style. Sort of. She mostly just swept up a lot of other, better, sailors’ vomit and trash. Once the chance came to prove herself, she requested a boat from her distant cousin, Lady Varren Marius, who granted it because Lady Varen had already pledged to support Cal after the return of the family spear by the Blue Delve Boys. Del is a Human Swashbuckler and has her own ship thanks to her reluctant cousin. Del's symbol, and the name of her ship, are both "The Crossbow."
[Doug's Note: The Swashbuckler class being used here is from Letters from the Dark VI: Scallywags.]
Ada Bittermold is probably an actual Bittermold. The lost family had a complicated family tree involving humans, halflings, and less savory entries. Ada looks more human than most of the current members except for the fact that she has deer antlers and deer hooves and lower legs. Whether demonic or Bleak-touched is unknown by her at this time. She tries to offset this by dressing in bright colors to show she is friendly, but the overall effect combined with her odd sense of humor and weird moods makes her look more like a poisonous tree frog than anything else. She is a ??? Witch and her symbol is a deer's head with multicolor horns and eyes.
[Doug's Note: Originaly, she was going to be a Tiefling as outlined in Unnatural Selection but after I was working out how to make Boris (below) I decided to make her a bit more unique instead. 3/day she can talk to plants or fungus (though plants are not great conservationalists and mushrooms are worse). The Witch class being from Cursed Scrolls #1.]
Boris Loo is a Teen-aged, Bleak-Touched, Ninja Chelonian. He comes from a long line of gentle chelonian fisherfolk but his parent's vessel was swept off course and shipwrecked off the shores of Barthus. Forced to travel through The Bleak to reach safety, his mother gave birth to Boris only to find her son was different. Rather than the soft curve of the sea turtle's head, he had the head of a snapping turtle. What's more, he was less concerned with gentle fishing and self-taught himself the ways of "the ninja" even as his Bleak-induced mutations made themselves more and more evident. The family tried to hide him belowdecks to act as the ship's cook. Once the Loos helped Gryffin get to The Pearl, Boris met the young Grunkheart and immediately adopted himself as Gryffin's hyperactive younger brother. His symbol is his own face, wearing his traditional green mask which match's Gryffin's cloak.
[Doug's Note: Boris started out as gentle, turtle monk NPC meant to be additional backstory to the Blue Delve but I realized the potential TMNT joke and sought to figure out how to accomplish it with Shadowdark. He is the Chelonian ancestry from Unnatural Selection and then a reskinned version of the Ras-Godai class from Cursed Scroll #2. In his case, it is not the Black Lotus that gives him his powers, but being exposed The Bleak while still an unlaid egg. There has always been the potential for more Bleak-touched characters but I have not really worked on figuring that out until now with him and Ada.]
Gryffin and Louis have already showed up, albeit somewhat briefly, in the game. Technically, Gryffin was the start of the whole Grunkheart clan and the drama with the Lighthouse and is the one who introduced everyone to Cal, but the basic structure of the Lighthouse was already created before Cal and Gryffin were created.
The Potential Others
There are already four potential other characters to fill in gaps in any of the ten existing folks die, retire, etc. I won't delve too much into them (pun!) until it's a better time to bring them up but effectively:
- A Garfolk Thief who was found by Cal in the Monolith
- A Mycellan Priest who befriended the thief and joined him on his adventures
- A Forest Elf Ovate who met and formed a relationship with Rance after a night of carousing (currently spending some time working with the city guard)
- A Salamander Slayer who has dedicated his time after meeting Grusk to learning how to fight devils and demons.
Each of these are a shout out to a previous adventure or two and are mostly a thin sketch which can be built up if the need arises.
 |
| Thanks to mockupsgenius on Pixabay. |
Previously, on The Bleak + The Pearl...
Battles with rust monsters and avoid a lot of poorly functioning automatons have driven the heroes to take a certain "backdoor" into the second layer of Jonias Grunkheart's lab basement. The lab has been reactivated causing changes through the Everburning Forest, but the heroes continue to dig for a single item: something that allows them to control the librarian back at the Monolith.
About The Bleak + The Pearl
The Bleak (Barthus) and The Pearl (Silt) are large twin islands. Once home of an Ancient Empire that fueled its machines and miracles by tapping into the primal forces found upon each (Becoming and Being, respectively). Two thousand years after the fall of the Ancients, the Barthic Empire that grew up in its place (one of many over the years) faced its own cataclysm as The Bleak (the corrupted version of Becoming) spread like a disease. Those who stayed were subjected to rapid mutations and strange changes: their own bodies warped into monstrous forms as even the land lost its sanity.
Three hundreds later, four heroes—Grusk Obe (Half-Orc Fighter), Inar Gale (Halfling Cleric), Spotted Tom (Goblin Thief), and Rance Uffolt (Human Mage)—are on a journey across The Bleak, risking sanity and their own existence, to try and save The Lighthouse: the last great act of Jonias Grunkheart. A piece of reclaimed Ancient technology that can bring balance to the out of control forces.
Content Warning: Fantasy Violence, Occasional Body Horror...
This post is in MULTI-PHASE style. See the about page for this blog for more details. The system used to play this is ShadowDark by Kelsey Dionne and the Arcane Library with SoloDark (same) acting as the oracle.
Part 22 - Down Into the Past
The team has rested up which allows them to regain all Luck and relearn all failed spells. HP back to full. Other supplies are running lower. Outside of magic spells, Tom only has 15 arrows remaining. There are only around 3 torches and a couple of bottles of oil left to the group. Both Rance and Inar have Light magic so that should not be a problem but only a couple more days of rations remain. There is a caravan at the edge of the forest that has some resupply materials, but it will take about a day to walk back out.
In other words, the next time the team is forced to rest it will be understood that they are having to semi-abandon the mission and return at least to the forest entrance.
Now on with the show...
 |
| Map © Dyson Logos originally with edits by me. |
At this level, the lab is around 60% based off of Elizin Urnlight's original research station. The walls are metal now (and not rusted). The slightly more primitive glow globes are more highly refined. Conduits are less a magical restructing of the Ancient Technology. The visual cues are more like a space station than a fantasy outputs. There are beeps and bloops and flashing lights in the walls.
This was Jonias Grunkheart's goal (before he found out about the portal and activated it). To get to this station and to reclaim it. While the upper three levels are varying degrees of a sales pitch, this was for the true believers. Of which he only ever had a couple.
There is a sense of worship and loneliness, here. A place meant to be the start of a revolution, the start of a reclaiming of the land. Largely unused besides for Jonias's own personal collection, there are not many automatons on this level. 1-5: Empty (besides given), 6-7: Hazard, 8-9: Treasure, 10: Automaton (1:6 chance of being burned out).
Like the previous map, a few basic notes and ideas are given below with specifics left to dice rolls and oracles on a per room basis.
B7: The Entrance
Meant to be the gateway to the whole proper lab, this room is a bit of a show-off. A plaque dedicated to Elizin Urnlight faces folks who enter into it with running water flowing down the walls (currently happening, though the water is a bit sluggish due to not being filtered in a long time). Lights are insight and bright. A few empty plants once held plants, now only very dry dirt and stems. A manifesto of Jonias's vision is written on the northern wall.
B8: The Gallery
This small chamber has a series of Jonias's last paintings, each depicting idyllic scenes of his youth and his interpretation of what Ancient Society should be like. The lighting is gallery like and there benches to sit in the cramped space.
B9: The Study
Here is one half of the actual destination for this whole trip. His personal diaries (early ones written in mid-Barthic, later ones written in Ancient) lay out his plans. Blueprints for expansions to the Lighthouse and the Monolith are detailed on these shelves. The Ancient technology has protected much of the paper but it is way too much carry back more than a few pieces unless significant space and care is taken.
In his desk are a series of talismans that will act as badges for automatons (incuding the librarian). Upon them is written a command word in both mid-Barthic and Ancient. This find, alone, is worth 3xp.
Unlike most of this floor, the light is less sophisticated. Jonias purposefully used lighting more like his own time's technology. The oil lamps are long sense broken down.
B10: The Research Library
There is a key in B12 behind one of the paintings to open this else DC18 to unlock this door.
Hundreds of volumes in Ancient and mid-Barthic writing cover an extensive catalog of Ancient technology. Many of the concepts are so advanced that even passing a successful DC21 INT check to get a grasp of what they are saying is unlikely to lead to much information until years of study are spent rebuilding the concepts from the ground up. Again, very bulky to carry more than a few pieces out and care must be taken once the protections of this level are left behind.
B11: Storage closets
Partially filled storage bays with a variety of bits of Jonias's life and early automaton designs.
B12: Jonias's Bedroom
Here the sense of loneliness is most evident. Jonias has a mere cot in one side of this large room where he slept. Boxes of art supplies, scattered journals, and adventure books written in mid-Barthic are scattered in the room. A sink with more sluggish water and some basic toiletries are to a side. A few paintings of personal interest hang on the walls. Behind one, DC18 DEX to find a strange hatch. DC21 INT to solve how to open it. It leads to a planned future extension to this layer that was never used besides as a kind of personal meditation space. The intervening room is more of his personal effects. Most have long since decayed, not being built of materials to survive the long years despite the lab.
Jonias has left his own talisman, slightly more advanced, here. There is also a key to B10 in the effects. DC12 to find.
B13: The Bedrooms
Three bedrooms intended for the inner circle. Only the middle one shows much use. Each has built in toiletries and storage. The northern and southern ones have a distinct "untouched" feel.
B14: The "Living Room"
Metal boxes in the south have recreational equipment. A kitchen area and dining tables are here, both more suited to an away camp that any sort of upper class enjoyment. There are spaces to work out and large pots contained small trees and a fountain. The fountain has been reactivated, but the trees are long gone.
B15: Automaton Workshop
Where Jonias worked on his automatons. A few repair jobs are spread out on long tables and some experimental designs are evident. Posters and sketches show the gist but INT DC18 to make any sense of them. Detailed sense enough to actually repair and rebuild the automatons would only be possible after detailed study time is taken. The cart tracks come down here and then turn up into B16.
B16: The Mining Station
The room to the left contains the basic control from the mining cart automatons. The room to the right contains equipment for digging out the fuelstone from the mines. The cart tracks come from the south and then head left towards the mines.
B17: The Mines
This goes on for much longer than showed on the map. This was the source of much of Jonias's fuelstone and involves years of digging and expanding. A few mining automatons have been left down here to gather supplies while Jonias is "away" but most of those have long since ceased to function. 1:6 that any are still moving. Piles of fuelstone will have been brought up and filled 2d6+2 worth of cart automatons.
The four heroes make it down into the well lit second level and begin looking around. The room they are in is fair sized with a tall roof. The walls look to be some sort of silvery metal on the light side. It has aged really well. Long tables are layed out, here, some of which have parts and even fuller pieces of automatons. Grusk brings out his axe. Inar starts to touch one of the handss but Tom slaps the hand away. [1]
"Looks like someone was destroying them," Inar says.
Grusk replies, "Good."
Rance notes some diagrams engraved in some strange paper [he does not know plastic] or directly on the metal. Looking at it, none of the notes make sense. "Maybe they attacked Jonias, too," he ponders. [2]
"Whatever happened, I don't think we're going to find the passkey the Golem needs in this room. Let's search around," says Tom.
The team first moves into the north room following the tracks. Here they glimpse at the mines going off into darkness and turn back with very little hesitation. Everyone is tired and a few near death experiences have definitely taken it out of them. The find a room full of mining tools that are in great condition. A few of them might actually be highly valued and Grusk grunts and takes a couple to hand to Inar to carry back in his backpack. [3]
Moving south and following along the hallway, they mostly say nothing and just stair. The area is...strange. Opulent. Very much in the mid-Barthic style. Paintings. Tapestries. More diagrams. Throw cloths. Some dusty and dry decay. More than that, though, there is a sense of a lonely clubhouse.
"There are games. Books of philosophy. Unplayed. Unread. Ash trays that have never seen a bit of ash. Whatever Jonias was doing down here, I don't think it happened," says Inar, taking it all in, sound sad for once.
"Or it worked too well and he was not here to enjoy it, I...," Tom is cut off by the loud sound of rushing water pouring through the room. The four brace with Inar hopping up on a bookshelf. Gurgles and burbles are all around. Rance even starts summoning forth an Acid Arrow. The sound goes on for a minute and then begins to subside. [4]
"Ok. That's our sign. Keep moving, I need beer," Grusk says. Heading south. Tom goes with him. Rance and Inar stay to investigate the doors to the east.
Each of the rooms has the same sense of loneliness and isolation. Beds of a strange design [more like the bunks on a space ship than anything the adventurers would have seen] are centered with cabinets, a study table, and cisterns full of dusty water. Toiletries in the back are essentially unidentifiable as advanced indoor toilets. A spigot from the ceiling provides a shower. Again, neither Rance nor Inar have any idea what they might be looking at. They poke through the bedding, touch a few knobs (Inar jumping back as slush tries to splatter him) and mostly come away empty handed. Except for a single potion bottle that Rance finds in the southernmost room's corner. He cannot tell what the potion is so for now pockets it for future study. [5]
The other two have found another chamber. Going inside the unlocked door, they take a moment to realize they are seeing not just some random junk room but the spot that Jonias lived by himself. A cot on the floor for a bed. Storage boxes for furniture. Many paintings showing pleasant scenes of people walking down streets, eating food in cafes, and riding horses across opulent gardens. Grusk, roughly at first but more gently as he understands the significance of the place, digs through things. Eventually Tom gets his attention. "Come look at this."
He leads Grusk over to one of the paintings and pulls it aside to show an odd door that looks almost like the door to burial alcove. Odd glowing stones upon it. [A hatch with code buttons that need to be solved based on an old Ancient rhyming song] "I don't know what it does but it seems important." [6]
"We'll save it for Uffolt. UFFOLT!," Grusk shouts, louder than seems necessary in the isolated quiet.
Rance comes running in with his wand up and then sees Tom and Grusk pointing at the small, odd door. Rance makes more sense of it than Tom. He presses the glowing stones which each make a chime. After half an hour he has played the correct tune and the door swings open showing a small room beyond. He nods back to Tom who goes first.
The room is even messier than the last, and feels more tragic. While the rest of this place is made of some odd material to survive a very long time, to even be repaired by the Light flowing into the complex, this room is stuff that Jonias brought from Grunce. Items of nostalgic value. Child hood toys. Favorite books. Clothes for parties. Most all of it has crumbled or broken since it was placed here. Book pages crumble into dust as they are touched. The toys crack as you lift them. However, in this room, a pair of hand models that are clearly the inspiration for the shrines hold an item each. One is a key made of the same material as the tapestries [plastic] and an amulet of some sort of the same material with Jonias's name, some strange lines and shapes, and then some writing in Ancient. "I think this is it, guys," says Rance. [7]
The other way they see more darkness and for now opt to not explore any further. They had back the way they came and find Inar waiting on the cot, patiently, thumbing through one of the books. "This is kid's stories about The Miracles of the Ancient Peoples. That's a choice for a grown man to read."
"I think he was a bit obsessed. Look at this place. It is weird. The lights are weird. The doors are weird. The air smells weird. Tastes weird. Not in the way of the cyclops weird but...," Rance opines.
"Weird," Grusk finishes.
"Now what?," asks Tom and the group debates a bit if they should push on any further.
After a few minutes of going back and forth on the pros and cons, the group decides they have what they need and there is no way they are the ones meant to be here. "This should be for Cal, he should be here. He could even make this place better than Jonias ever did!" [8]
They head back up the ramp by way of the rope they have left. Stop and eat their final packs of rations. And then make the trip back to Grunce. The city they feel more and more is their home.
Formalizing the Depths of the Bleak
In order to make it more consistent, the Bleak's shallows and such, the following system will be used to test for Encroachment.
- Bleak Level 0. Jonias called these Borders. Others use the phrase Islands. Identified by the color of bone slightly stained by time. No roll needed. The most prominent example is Grunce itself and a couple of miles to either side as well as essentially all areas with a couple of miles of the Gray Channel.
- Bleak Level 1. Jonias called this level the Shores. Others now say High Shallows. Identified with the color of a gray cloth sunbleached by a couple of years. D100/D20. Stretches around 12 miles around Grunce and much of the way to the Everburning Forest. Around six miles near the Gray Channel (game terms: 1 hex near the channel).
- Bleak Level 2. Jonias called this The Shallows. The new term is Low Shallows. The color of shadows in a late afternoon. D20/D12. Most of the plains south of Grunce has this. Large patches of this level extended in paths out from Grunce. Around half the hexes past the first from the Channel.
- Bleak Level 3. Jonias called this and Levels 4 and 5 all the same: The Deeps. Now this is identified as Upper Depths. The color of shadows at twilight. D12/D10. A patch between Grunce and the Sofron Desert registers this.
- Bleak Level 4. The Lower Depths. The color of darkness in a large cave lit only by distant moonlight. D10/D8.
- Bleak Level 5. The Abyss. The color of night while blindfolded in a deep, deep cave. D8/D6.
- Bleak Level 6. The Black Hell. The color of sight after death. D6/D4.
- Bleak Level 7. The True Bleak. No color can represent it. D4/D2.
Note: the colors are how it is drawn on certain maps or described in more literaly writings. The actual colors associated with the Bleak tend to vary greatly depending what changes it causes. it is actually not unusual for higher levels of Bleak to look oddly beautiful as plants and animals warp into new colors of the spectrum while their physionomy twists and warps into non-euclidean shapes. There are of plenty of places where colors do darken, as well. The impacts on eyesight of people undergrowing Encroachment only enhance these effects because eyes, skin, and hair are usually early markers of being altered.
For each month at one of levels 1 and 2, make the described dice rolls (if you travel through multiple layers, go with the average). A 1 on the first (larger die) represents immediate Encroachment. A 1 on the first (smaller die) represents Encroachment detected in your offspring.
This reduces to each week at levels 3 and 4.
For each half week at levels 5 and 6, do the same.
For each day in level 7, do the same.
There are no recorded Level 7s because the effect is too strong. Grunce maps do record many 4+ levels but most are beyond the trade routes of Grunce for obvious reasons.
Encroachment at levels 1 to 3 tend be relatively minor even across multiple generations though the effects worsen at each increased mark of depth. Folk living in 1s and 2s might see skin and rough shape change over a few generations (sharp spikes are possible).
For each point of Encroachment, double the time between checks. Those in the Bleak sometimes find a new true form that sustains. New generations do not get this increased time and reset upon birth. Level 7 does not increase in time. If anything, longer exposure speeds up the process even more.
For each level above 3, Encroachment is a bit more pronounced. At Level 7, The True Bleak, each Encroachment should be considered forever life altering to the point of entities impacted being potentially unrecognizable after just a few days. Entirely new species are created, and die, in patches of True Bleak all the time.
For reasons unknown, the waters of the Gray Channel, if bathed within (even if contained in barrels, etc) before the week | half-week | day is up, will reduce the chance of encroachment by 1d6 levels. If the level is reduced to 0 or below, Encroachment is entirely avoided. This is not exactly a well known fact just yet but in general civilization has found itself gravitating the places where the sea spray and availability of Gray Channel seasalt has done wonders to basically hide the effects.
For now.
Summing up the Next Couple of Days and Beyond
It took 2-3 sessions just to navigate into and out of The Everburning Forest for a number of reasons. There are a series of things that are about to happen that could realistically take 2-3 more sessions if played out:
- Rance and Inar are going to stay at the lab (yes, with essentially no rations) while Tom and Grusk run at full sprint back to the tower.
- Grusk is going to pay the retainers there 300gp between coins and trinkets for slightly more than half of them to travel back to the lab and set up a camp while most of the others reinforce the camp at the tower.
- All four heroes will then leave together with the lab and tower both reasonably guarded.
- Folks from Grunce will be sent to improve this, assuming folks are ok with traversing the Level 1 (aka, Shores, aka High Shallows). Potentially including Cal.
- The four heroes will take something of a vacation fighting over spots and going on adventures while Cal gathers up supplies.
There are three chances for random encounters between the lab and the tower so we need to make 9 total rolls. The of the first three (with just Tom and Grusk). We get one. First, Grusk has made his rolls to push forward at double speed but Tom is starting to lag behind and will be at a disadvantage.
The encounter was a group of barbed nets placed by the { salamander | cultists } → salamanders. Grusk manages to avoid getting caught BUT Tom does get snagged and takes 5hp damage. Grusk starts cutting him down and they lose one hex's worth of time.
The retainers are in it for money and overall this mission is no more dangerous that some (and this is a Bleak O area so is safe to say). Rolling an oracle test to see if they accept the transaction with advantage we get 13 → yes, but only for two weeks.
Now, Grusk and Tom head back with the retainers with very little time to rest (but this time there are horses and such). Both Grusk and Tom fail their push rolls so we add another hex's loss of time.
Random encounters? None this time.
Now we are almost a day later. Inar has held up but Rance is in a pretty bad place. Even eating food he will be at disadvantage to pretty much all checks past this.
Now the four ride back out, again. Random encounters? There is one fairly close to the lab, it is... 65 → 2d6 vultures pinwheel above the PCs, drawing attention (I am using the Desert tables as being sort of the closest I got). Instead of vultures, we'll say they are ember buzzards, a species adapted to tracking decay and death in the smoke and heat. The attention they draw is { salamanders | cultists | other } → cultists. 2d6 (10 rolled) cultists show up (far enough from salamander territory that the boys will not have immediate back-up). They immediately decide to try and run hard towards the fire elemental and rely on their dragonsilk robes. Poor Rance falls from the saddle. Grusk and the others adjust and fight. Will use a very simplified fight mechanic here. 1 roll per party. +4 for the team with 1d6 damage (1hp = 1 cultist dead), with +2 for cultists with every 3 points = 1d6 damage distributed among the team. Round 1: Team gets several good hits in (5 cultists killed) and cultists get a 1 so completely fumble. They do not make their moral check and are driven off. The team does not spend any time looting the bodies, they get Rance back in the saddle and head off.
With that the team is cleared of the forest and head back to Grunce.
They are paid 1d6x100 = 100gp for their efforts. They turn over their dragonsilk to Cal and his team as well as hand over the key and artifact and get another 1d6x100 = 600gp for these major prizes.
On top of this, there are things to sell! The phoenix statue Grusk does not sell but hands over to Cal's team for future use. Grusk keeps the copper flask and fills it with good rum (-10gp). Inar gets full value for one of the fuel-stone tools and one quarter value for the other (37gp + 5sp). Tom gives the meteoric iron and the strange creature relic to Cal's group. Tom gets 95 total for the gems collected from the golems. This might have gone to Cal but I don't think he would have realized. Rance hands over the volumes of Ancient writing he found and tells Cal there are probably lots more. He keeps the egg of the cockatrice for future fun and spends 1d6x10 = 20gp to have the potion of flying identified. That goes to Tom to be stored in the bag of holding with the other potions. It takes him 2d6x10 = 120gp (!) to receive medical treatment for the damage he took due to starvation and the burns and such.
All told, this leaves the group with 1193gp worth of value accumulated over this past month or so of adventure they have been on a pretty constant run.
They are going to spend 600gp hosting a lavish party with many of the Lighthouse Keepers and friends they have met. A boat cruise along the Gray Channel for all! +3 to Carousing.
Grusk gets a 7. He lead an entire tavern and gains a bard ally (I know who the Bard will be, keep your eyes open). +4XP. +8Xp total for this session (which is actually like 2 sessions highly compressed).
Inar gets an 8. He survived a knife throwing competition. +4XP and a luck token. Since that is kind of useless for SoloDark I will say he gets a "free luck token" that can be spent at some later time. He also has 8XP for this session.
Tom gets a 5. Tom loses 10% of his wealth for starting a brawl (we'll calculate this) and cannot go back into a tavern. We'll find out which one later. +3XP for 7XP total.
Rance gets an 11! He performed a prank (probably magical) on a despised merchant. Again (this was the first time he went carousing as well, at least we know what he does while drunk, eh?) He gets another ally in the city watch that I will figure out later and finally gets +5XP for 9XP total for this session.
This leaves each of them with an average of 1193-600 = 593/4 = 148.25 and Tom loses 15gp of that. For simplicity, Grusk will carry 300gp and Inar will carry 200gp. They have the most slots. The other 78 will be split evenly. There will be some downtime shopping before the next adventure.
They still have a bit to go before Level 5 but they are all past the half way point.
And with that, the first full arc of this campaign comes to a close.
It will take around 6 months for Cal to have cracked Jonias's very codes and mechanisms and fully start integrating the lab and learning some of the final secrets left by the elder Grunkheart.
DOUG'S COMMENTARY
That was 100% "rushed" at the end but I felt it was a good time to give a needed pause to four heroes who have spent a month or more in game time gathering up things, fighting battles, and then spending around a week or more in a forest full of ash and smoke and pushing themselves through all of their supplies. If I was running a multiplayer more traditional game, I would have likely just handwaved the trip back to town. Had I played it out here there would have been a session mostly running to the tower. Then a for sure session of a starving Rance and the rest of the team dealing with a group of cultists. No doubt the team would have won but it would have been a lot of planning and challenging moments.
I already wrote some of the reasons why I sped this up a bit in the recent published Intermission #5 about why this series is going on a quasi-hiatus. Not an actual "there will be no Bleak + Pearl for a while" but the sort of one where the next two to three months in real life time will be spent doing various pre-written adventures with maybe a couple of randomly generated dungeons. There will be several new characters starting out at level 1 (including the bard, above, and I guess a new city guard member since the last one is showing up as a ranger already). A few of the fuel-stone relic quests will be included in there. All in all, though, it will be a nice time for me to take this series and take it back to its 70+% off-line roots.
Once that quasi-break of pure dungeon delving is complete, we will move into the third arc where I hope to ramp things up a bit and have quite a few squabbles in Grunce and beyond, trips to at least one other plane, trips into deeper levels of The Bleak, potentially trips to The Pearl. We got to have a proper Big Bad at some point to show up. A dragon? A powerful warlock? Jonias riding a giant fuel-stone mecha? I have no idea. I will make it fun for me and maybe, hopefully, also for you.
MECHANICAL AND STORY NOTES
- Scrambling down the ropes into the second layer. DC12 with rope + advantage for preparation. Grusk = Success. Inar = success. Tom = Success. Rance = he makes it! The mining cart does not detect them on the track. Room contents = 2, empty.
- Rance gets a Nat-1 (crit fail) to make heads or tails of any of the diagrams, alas.
- Are the tools in good condition? (Advantage) 20 → not only are they in really good condition, they have some value besides. They will give advantage on mining checks. 30gp each. Grusk and most of the rest are out of space (not time with his treasure filled bag of holding)
- Random encounter was triggered while entering into B14. Since the whole point of this zone is that it is fairly hermetically sealed I just tried the Something Happens! table and got the sound of rushing water. It makes sense that the water purifiers are trying to activate and push centuries old water through filtration systems that might be a bit gunked up.
- Three bedrooms are empty, empty, and treasure. Treasure is 89 = Potion of Flying (200gp). Rance gets a 5 on his ID check and does not pass.
- Room Content: empty. Tom gets Tom gets the find secret door roll with 16+3 = 19 check. But his INT check is 18-2=16 which is not enough.
- Rance gets 18+3 = 21 which is enough to solve the puzzle of the door. +1XP for that. Rance also figures out this amulet is the type of item they need with a INT 14+3 = 17. +3XP for having even one.
- Used the old vote dice mechanic complete with its swings back and forth, essentially rolled 4d6 with 1-3 = leave and 4-6 = explore. After four rolls, more dice said to leave. It's an old classic for this campaign meant to emulate how the group often gets into debates and swings back and forth in mood. No encounters doing this time.
== CREDITS ==
This campaign is played primarily using Shadowdark and SoloDark, both by Arcane Library and Kelsey Dionne (et al).
Additional sources include a variety of things for tables, especially Knave 2nd Edition and Maze Rats (both by Ben Milton), Random Realities by Cezar Capacle, Universal NPC Emulator by Zach Best, and various pieces from Worlds without Number and Scarlet Heroes (both by Kevin Crawford).
Opening art at the top of the post is "borrowed art" meant to be invocative rather than precise to illustrating the story. Image tools to generate some of the art is GIMP and Hex Kit (featuring the Lil Hex Pack and Strange BW Hex Pack).
Photo the sort of "alien lab with a painting hanging" is by mockupsgenius on Pixabay. It seems to be their only shared art. In this case, had this not been the tail end of a two-months' long sprint through some complicated lore, lots of fight, and a whole two+ modules' worth of adventure created largely on the fly, it might have been nice to slow down and appreciate how much this final level was truly alien with its space station like walls and lighting and doors. Deep down, though, I think the team deciding to leave right away is truly what what those characters would have done. They are capable of great feats but there is a part of them that always plays it a bit safe and they take care of one another.
The map is from Dyson Logos's "Temple of the Worm" series. This one in particular (the second basement) had some sections removed [it is really obvious when you look for a couple of seconds] because there are other levels below this. In my head canon (which is also the canon of this whole series, by the way) those levels exist but Jonias had not uncovered them. When we see this lab again, and we will, it will be Cal's workshop and those levels are likely to return so some exploration can be done of Elizin's original research station. There is a fair bit of time before that, though.

Above is a glimpse into how this campaign started six months ago. Dyson Logos maps (or dice drop point crawls) imported as backgrounds on Google Presentations; John Kapsalis art (almost always, with some games-icon icons when nothing else made sense) made into tokens using GIMP; map adjustments and such typed directly as text fields on the map; and a few notes and details typed into a couple pages of a Google Doc file. This still persisted until the Monolith got going enough it was easier to switch the whole campaign to Theater of Mind and blog-format first.
Bonus: You can see which Kapsalis heroes and monsters I picked to represent our main four heroes. Spotted Tom was just one of the goblins that caught my eye. Rance was a contemplative blue mage (maybe an elf, don't recall) token originally used as Haig Raven in my Barston Bakersfield campaign. Inar is a silly little hafling with a staff (he wears pretty sturdy armor in the main campaign and has a crimson-red mace). And Grusk was depicted as shirtless and got his signature axe because his token had one. With the exception of Tom, the other three names were from when I tried to make the campaign in Roll20 to start and I just literally used the default random names generated. I actually kind of forgot that's what the characters looked like.
Too Long; Didn't Read Summary
In short, the campaign started as my "just dungeon, don't story" campaign and got immensely Doug-ified on the way so now requires pages of lore and while it still has some fun, usually quite short "dungeon" dives it has lost a lot of its initial anti-campaign focus (the exactly opposite of that, really). Since there are possibly months of main storyline left, using a natural break in the storyline coming up to go ahead and declare it time for a couple of months of side-quests and introduce several (at least six) new characters to make a kind of second team that will join the main one here or there in various ways. Will eventually shift back into the main storyline after everyone gets a few levels higher and we can move into the higher level, more domain-level of play.
Or, How a Campaign Changed Over Time
According to my notes, I launched this campaign, The Bleak + The Pearl, around the middle of June 2024. At the time, there were only a few basic lore truths:
- There were two vast islands that combined were a complete continent.
- The western island was "The Bleak" and was dark and foggy and grimy and full of ruins. This island was originally Barthus and for centuries had been the site of a great kingdom but now was mostly just skeletons of old buildings and smaller settlements. It was to be the setting of the more "grim" sessions.
- The eastern island was "The Pearl" which was a wild and green place with huge mountains, ancient barbarian keeps, dragons, and much more of a "large scale, mid-magic fighters-in-leathers tackling giants" kind of vibe. This was "The Silt" and was the place the ex-Barthics took refuge. This was to be the more "Frontiers of Adventure" style setting with less undead and more, you know, dinosaurs.
- The islands are separated by a five to twenty miles of ocean called "the Gray Channel". Whatever caused "The Bleak" has yet to find a way to cross it.
- The initial heroes were refugees raised in The Pearl who are now going back to The Bleak because one of them keeps having dreams about a light fading, darkness spreading, and things getting worse.
There was, effectively, two meta-truths:
- This campaign was going to be dedicated to pretty much straight dungeon delving and hex crawling with a few interrupt "city/society" scenes to act very nearly purely as dressing.
- Around half of the sessions would be played in pre-existing maps while the other half would either take Dyson Logos (etc) maps or just do a dice drop and use existing tables to find out content as I went.
It was the second (not posted to this blog) session where a drunken night turned into meeting Cal Grunkheart and deciding to help the Lighthouse Keepers which ended up becoming the meta-reason behind the campaign. This part is fine. It was initially going to be a mini-arc of sorts but over time morphed into a much bigger part of the campaign. Still fine.
As the mini-arc took over, there showed up a a mini-mega dungeon that was the cornerstone of this part of the campaign and a series of quests to the other dungeons and sites were going to be required to fix it up. This was fine. The "about 10 sessions to complete" was a lie but that's ok. We were still playing.
Prior to even starting to make the dungeon, I ran a couple of sessions in a pre-existing map, The Lost Citadel of the Scarlet Minotaur, tweaked to have elements from the campaign. Almost an entire month later, after spending way too long semi-agonizing on how to blend the more meta-elements with that initial intention we got the first entry into the Monolith.
Over the next few weeks, I entered into an era I've talked about before but it represented me dealing with the stresses of solo-play. It felt less and less like fun and more and more like a difficult puzzle to solve. On the positive side, this led me to work out my more multi-phase style that is a staple for this blog (see: The GLOW for perhaps the most elaborate variation of it). I've seen other solo players do similar things but the distinct GM-phases where I build up information and player-phases where I test and break down that information (along with lore, interjections, and other elements) is a fairly Doug-Unique style of solo-play, one that has influenced even the play I do off this blog.
However, on the more negative-or-at-least-neutral side, I essentially lost the ability to sit down and play with a couple of colorful tokens and some varied dice rolls and had to spend increasing amount of times fact checking and considering long term impact of any and every decision.
Around three weeks from the start of retooling this campaign more and more into "Save the Lighthouse, Save the World," I got to an encounter that effectively derailed and forever altered the entire The Bleak + The Pearl: The Grunkheart Golem. I had one room left off the starter/main branch of my dungeon and when I rolled the contents I got a boss monster. I suck at the sort of OSR-style play where rooms next to each other to have completely different contents/encounters so I wanted to come up with a reason a boss-level monster could be a few feet from the main entrance. The Golem was a solution to this and it changed quite a bit.
- Ancient Technology was actually some blend of high, science fiction technology with a much more refined magical system.
- After the Ancient society collapsed, there were hundreds of years before Barthus showed up and established itself in the ruins.
- Jonias had a more extensive appreciation for Ancient Tech than thought and had not died but instead went off to a lab in something called "The Everburning Forest" and not returned (I mean, he might have also died, we still don't know at this time).
These seeds grew and sprouted a bit. After one intermission where I came up with a general layout map of the forest, I had another intermission that finally sat down and figured out what the Bleak and the Pearl were. No longer just the name of two different fantasy tropes, The Bleak was a corruption of some primal energy inherit in the western island (in the Ancient tongue, it was The Becoming). Ancients had used it as part of their vast engines (along with The Pearl's "Being"). The fall of the Ancients was basically due to them using up too much energy and draining it. Now, several centuries later, it has returned and it is changing people and causing buildings and landscapes to mutate though there are "shallows" where it has little to no impact and many settlements drifted into those shallows while traveling between them is basically an invitation to body horror.
This led to a fight with a fight with an oddly mutated cyclops around two weeks later and then a full month after that I finally hit a stride with playing as the entered into the forest and encounters and mechanics were a lot more normal. Over the past couple of months they have pushed through the forest, found the old lab, and realized things are a lot weirder.
While all of these shifts and dynamics have been broadly fine it still is a much different campaign than intended. For one, there has not been a pre-built dungeon/adventure since June (6 months). For two, roughly half of the session time has been dedicated to building up the world and establishing dozens of new World Truths.
I adore the four core characters. I love Cal Grunkheart and his doomed mission that might just succeed. I like the whole trope of science-fiction world becomes high-fantasy world becomes weird body horror world.
BUT, this was meant to be the campaign where I did not have to spend quite so long building up dungeons and where I could spend a lot of time just flipping through shopping lists and throwing a few fun monsters at people while checking for random encounters. It is just very hard to swap back to that without there being the sense that I am giving up on a lore I have spent four months honing and perfecting.
To sum up some changes: A simple world to allow both "grim" and "dark" styles of fantasy play with only a vague storyline to justify it >> a "short" meta-quest that requires some more storyline >> the storyline becomes entirely about the meta-quest which starts dictating exactly which kind of adventures can be played >> dungeon delves start taking a backseat to more complex encounters >> virtually every post is as much about lore building and campaign design than any sort of proper dice rolling >> where we are now.
Taking a Hiatus from the Mainline "Jonias Grunkheart Legacy" Quest
That's why I am going to take advantage of plot developments in the world where it will take months of in-game time for Cal and his crew to move into the lab, learn the Ancient language more completely, and just get out and do some dungeon delves with pre-built or quick-built dungeons.
The "main four" will still be part of this. However, I am about to introduce a "second six." There were Five Great Families that came together to build the Lighthouse. The plan is to have a member from all five families join in. Some of the second six will be a tad weirder than the "four default" classes. A bard and a ranger. A pirate of some sort. A dragonborn pit fighter. A tiefling witch. I also have a silly idea for a turtle monk. The ranger will be second level and a character already met in the campaign. The other five will all be brand spanking new.
This allows a few things. First, I can a couple of low level adventures again and those are always good fun. Second, it gives me a chance to build up a few back-up characters just in case one of the mains gets taken out or needs to spend months crafting spells or running a kingdom, etc. Third, it gives me a chance to build up a few alternate parties and combinations since those can be fun. Fourth, it just allows me to use a lot of supplements and zines I have paid good money for and I am itching to see how other classes and races work.
Finally, it gives me a chance to go back for a bit to the OG campaign design: dungeon delves with minimal story requirements. An anti-campaign again, only this time backed with months of story that shapes some truths.
Folks show up at a dungeon entrances, they go and grab treasure and experience, and then get drunk afterward.
Being Spoiled for Choices and Return to Recap
Part of this is just because I currently have three very "talky" campaigns: The GLOW (which has at least two more mini-arcs I'd like to do, and it will likely spawn more), The Bloody Hands (the Stone Crack'd mini-arc likely has four to five more sessions at least, and a lot of world building is going down there, and I want to run another mini-arc soonish dealing with one character's hidden illness and a hidden benefactor plotline from near the start), and Eustace Delmont (which is on pause, technically, because I have no time to play). There are also a few one-shots and playtests brewing or on-going. All told, I spend between eight and twelve hours a week playing these solo campaigns. I get lots of NPC interactions and world building time.
I like the idea of taking a few maps, importing them into Google Drive, playing with some digital tokens and spreadsheets, then spending maybe half an hour a week writing up some of the fun things I did. This new arc will be back in recap style with a more OSR-style balance and less seriousness. A lot more braindead than I tend to solo-play. In balance is joy...
The "side-line quests" [I'll call it something like The Gathering of the Families and Sundry Adventures] are a way for me to play with some of my absolute favorite solo characters, add in some more funky folk that will either be fun to play or get kicked off the team, and reduce lore from multi-paragraph continuations to maybe a short passage about why an Inn is called "The Screeching Duck" or something equally silly and funny (to me). Eventually Cal will have deciphered some stuff and we'll be ready to get back into the main questline again. The Bleak is still there so hex crawls can have unexpected results, for sure.
In fact, a couple/three of the planned adventures are actually going to be from the original story bank of adventures intended to tie into the Monolith (though now low enough level I would have had to redesign them or tweak them a bit for balance and content only now I can just drop a newbie team into them and play as is). The very first one I plan to play will be a different crew going after one of the fuelstone relics. Maybe also the second. So it's less a hiatus as a bunch of side-quests presented in a different way until I feel like it is time to get back into the deep lore and two pages of conversation again.
 |
| "Stairs, Steps, Old" by depaulus on Pixabay. Recolored by Doug Bolden. |
Previously, on The Bleak + The Pearl...
The four adventurers have explored the upper floors of Jonias Grunkheart's laboratory and have continued to make discoveries without context of Jonias's true purpose. A battle with servitor automatons pushed the group to its limits but they are rested, healed, and ready to to embark downstairs to make sense of the strange mysteries they have found.
About The Bleak + The Pearl
The Bleak (Barthus) and The Pearl (Silt) are large twin islands. Once home of an Ancient Empire that fueled its machines and miracles by tapping into the primal forces found upon each (Becoming and Being, respectively). Two thousand years after the fall of the Ancients, the Barthic Empire that grew up in its place (one of many over the years) faced its own cataclysm as The Bleak (the corrupted version of Becoming) spread like a disease. Those who stayed were subjected to rapid mutations and strange changes: their own bodies warped into monstrous forms as even the land lost its sanity.
Three hundreds later, four heroes—Grusk Obe (Half-Orc Fighter), Inar Gale (Halfling Cleric), Spotted Tom (Goblin Thief), and Rance Uffolt (Human Mage)—are on a journey across The Bleak, risking sanity and their own existence, to try and save The Lighthouse: the last great act of Jonias Grunkheart. A piece of reclaimed Ancient technology that can bring balance to the out of control forces.
Content Warning: Fantasy Violence, Occasional Body Horror...
This post is in MULTI-PHASE style. See the about page for this blog for more details. The system used to play this is ShadowDark by Kelsey Dionne and the Arcane Library with SoloDark (same) acting as the oracle.
Part 21 - Going Underground
{{ GAMEMASTER PHASE }}
 |
| (c) Dyson Logos. Mild Modifications by Doug Bolden. |
Jonias Grunkheart's Lab, Upper Basement
The upper floor of Jonias's lab is built on top of the remaining portions of Elizin Urnlight's old Everburning Forest research station. Jonias scavenged increasing portions of the tech and those are evident in the motif as well as in specific sections. The decor of the rooms lean more to white stone with blue lines and filtration system keep around 90% of the ash from building up here. Ceilings have (inactive) glowglobs attached to stylized conduits. Once the controls are activated in B3, these rooms will be lit. Various automaton, some of which are deactivated, are on pedastals.
Automatons on This Floor
All "minion" style encounters are automatons. Outside of the Viperian Ophid Class as noted below, the rest are 1-3: simple servitors, 4-5: basic servitors, 6: advanced servitors. Specifics to each can be determined as found. There is a 3:6 chance they are deactivated in the long years since the lab was last used. On a roll of 6, the internal working should be considered too worn down to work. Once B3 is activated, still check to see if automatons have worn down.
B1: Examination and Prep Room
While 2 (Transit Room) and 4 (Cleaning Room) have equipment to finish off and sort some fuelstone brought up from the mines below, B1 is the heart where fuelstone is fully sorted, trimmed, carved, and initially activated. On the section of the room are cart tracks leading up from the lower basement and through the ramp into the upper floors. On a raised platform, a series of tables with intricate equipment is visible. To the western side, the tables are closer together and the equipment is more primitive—roughly equivalent to some of Cal Grunkheart's equipment back in Grunce. As it tracks from west to east, the tables are "newer" (a relative turn since the newest one is over three centuries old) and more advanced. The last few tables built are quite advanced and on the lower tier of Ancient technology. Jonias spent decades learning more and all-in-all was a fast learner.
B2: Lower-Access Research Library
This was a library which housed some of the simpler, less-vital research books. There are four cases and each case has a 2:6 chance of having surviving texts. The more controlled air of this area is better at preserving the materials but it still remains dry and hot. If any surviving texts are found here, a INT DC24 roll (reduced by 3 per additional text and by an addiotional 3 if more than 1 week is spent in study) will help to bridge the gap between Ancient and Barthic languages.
B3: Control Station
Monitoring stations are in the north portion of the room. Glass screens which flash Ancient sigils while active are next to tubes and gears that provide other feedback. Through the locked doors (DC18 to open, but at disadvantage, key is downstairs) leads to stations with levers and gears to a) activate lights and life support; b) activate and control automatons; and c) activate and control the portal upstairs (in that order from west to east). The controls are written in Ancient but flipping the switch is somewhat obvious [just what it does, not so much]. INT DC18 to have a decent concept of what is happening if time is spent there.
B4: Scanning Room
This room was designed to scan security for the people who enter it. Two guard automatons (Viperian Class, 3:6 to still be powered) will activate if the doors are breached without the scan being done and the scan can only be done if the #a switch is activated in B3. The doors are not locked.
B5: Demonstration Theater
In the earliest days, the Temple/Theater upstairs was meant to be Jonias's place for demonstration. However, as the lower levels were excavated and built, it was turned into the portal room. This room took over as a place where Jonias could show fuelstone technology to guests. [We know from previous posts that the whole attempt to get more people to adopt the fuelstone tech was a flop so there is little chance of this room ever being properly used]. A few fancy seats look up on a stage where a table on par with the most advanced in B1 and a few podiums stand. These were the core of his "magic show."
B6: Second scan and security access to lower basement.
Both the north and south chambers contain more (currently inactive) equipment to scan visitors to check for access into the lower basement. Both doors are sealed with fuelstone tech and require STR DC24 to force open until B3 is activated (and then requires passing the scan of known people which accessible only in the floor below). Each door is guarded by another of the Viperian Ophid class automaton. Like all automatons on this level, there is an innate 3:6 chance for active status prior to the B3 switch. They will aggressively protect the doors if active.
Accessing the Lower Basement through the cart route
These shafts are narrow and steep. DEX DC18 to navigate them before activation of B3 (they are part of the automaton branch). Failure results in 1d6 damage. DEX DC15 to navigate once lights are on but failure results in 1d6 fall damage AND 1d6 damage from the fuelstone energy in the tracks. Furthermore, the carts are themselves primitive automatons (INT -2) who have a DC12 check to detect some disaster on the track.
[[ PLAYER PHASE ]]
The four have made their way over to the tool room and the large set of stairs there. Casting a light spell, Rance has his wand glowing and the four make their way carefully down the steps. Tom is leading with Grusk close behind. Inar is in the rear. Rance holds the light high from the middle.
The group stops as Grusk and Tom simultaneously let out a hissing noise from the bottom of the steps and Rance has to bend over to see what they see. Inar is too far back up to have a clear view so the halfling asks, "What is it?" [1]
"Couple of those snake golems that attacked us above. One of which is definitely turning to stare at us. The other seems...dead. Not moving," says Tom by way of explanation.
Grusk is already pulling out his magical axe, the blood-red-bladed Bloodlust, and with a shout runs forth into the room with the axe up. Then stops. The "golem" is not moving. Just watching.
"It's a trap, right?," asks Inar.
"It is always a trap," responds Rance, still crouching on the steps and watching, wand now fully aimed at the viperian ophid automatons.
Grusk walks forth and knocks on the automaton with his hand. Nothing occurs. [2]
Grusk looks back. "I'm going to chop it and wait to see what happens!"
"No, wait," calls Rance, the seer entering the chamber now with Inar following close behind. "The ones upstairs went on attack because we got near the swirly mirror thing. These are, well, trying to stop us from getting to the door? Tom?"
"Yeah," says Tom, thinking. The goblin checks out the door and spots no traps nor even obvious locking mechanism but when he goes to put a hand on it, the automaton quick whips its head to watch. Tom pulls his hand, back. "They are definitely stopping us from going through this door."
"So I chop it?," asks Grusk, still next to the automaton.
Rance again calls out for the half-orc to hold tight and examines the structure at the south of the room. A few inches higher than the rest it makes a step up into a rectangular platform filling the entire southern alcove. Then, in the middle of that, another smaller rectangular platform is again a few inches raised. At the corners of it are four pillars. They just appear to be more of the white stone prevelant in this layer of the lab. Except... "There is fuelstone laced in these pillars. And it attaches to those metal conduits making all the strange shapes, going over to that orb full of liquid, there. I think this area should be doing...something. Maybe this is helps us get past Hiss and Spit. Or we, you know..." [3]
The goblin answers the un-asked question, "I am for going back up and going down the tunnel with the railing." [4]
Rance responds, "I know what Grusk wants. What about you, Inar?"
Inar looks at the automatons uneasily. "I think it's worth at least a chance to see what the other way is about before we risk damaging anything." [5]
Rance looks at Grusk and the half-orc shrugs. Puts his axe down (but not back into its belt-hook) and backs away keeping an eye on the automaton. "Ok, then, up and over and let's see what we find."
They make their way back up to the previous floor and follow the tracks around and look down into the dark, steep path. "Why do we not have any rope?," asks Inar, giving it some thought.
The group goes back to the room at the top of the stairs that had various tools and gear stored. Everything there was in rough condition but in the side room with the strange armor and cloaks hanging on the wall, a good amount of rope was stored in the same material (and therefore has resisted the incessant burning). Sorting through the bits, they find hundreds of feet of rope and tie together about a hundred to start. Tom will go down first to test things out. Rance casts Light on a necklace Tom is wearing which is wrapped in a cloth so a dim glow shows the way. [6]
Tom's foot slips slighlty in the slightly-less-than-completely-dark tunnel but he regains his footing and continues down more carefully afterward. Getting to the bottom he glances around and then makes his way back up. "Biggish room, bigger than this. Some sort of tables with bits on. Like a jeweler's bench. Lots of these laying around." Tom hands over a fist-sized beetle made of metal and fuelstone. It is clear from the way the wings move that it once was a automaton but now is dead. It is unclear if it will get back to working agin. [7]
"Guess the little ones don't have as much...um...go?," speculates Inar as he pokes it with a finger, gasps, and then tosses it away from him like it was actively trying to bite him.
Grusk brings his boot down hard on it. "At least these are easy to crack. You said there were more?"
Tom and Rance stare at the needless destruction but Tom eventually nods. "It's a bit slippery with all the ash in the tunnel, but hold on to yourself."
The four start going down in the same order they were descending the stairs earlier. Grusk and Inar both nagivate it about as well as Tom, holding the rope. Only Rance slips and he slides down hard enough to smack his wizardly head into the floor. Inar says not a word as he casts Cure Wounds on Rance's bleeding scalp. [8]
Regrouping at the bottom, a chagrined Rance has been poking at exploring the tables up on a raised portion to the north of the room. There are a number of moving parts, things like that look like chisels, basins, and other bits that make only a rough bit of sense to the seer. "I think Tom was right. These are like jeweler's benches, only..."
"Only for really big jewels," Inar cuts in. "Like Brother Daniel might use to carve some of the statues and pillars back at the temple."
"Right, only...more sophisticated. Look, more of those conduits out of this strange metal attaching them to paths along the floor, up the walls, and then to another series of of those globes in the ceiling. And then they..." Rance jumps down to the main and floor and then moves back and forth along the exits to the room—there are two about equidistant in the south wall—they follow this one on the left-hand side. [9]
He almost absentmindedly follows the path while the other scrabble to catch up. As he is following the conduit lines and the strange, arcane path across the ceiling, Tom points out that there are more of the inactive lady bug automatons on the floor. "More bug golems." The room they are in is some sort of study. A few stone bookcases are covered in what was once books but now is mostly dessicated remains of books. A couple of volumes have weathered the passage of time enough to still be in roughly one piece, though. The goblin pokes Rance and has him come take a look. Rance flips through and shrugs. "Some of this is old Barthic. Some of this is...something else. I think this is Ancient. I can't really work with either but Cal probably will be thrilled. Rance places the books very carefully in his backpack. [10]
Moving south (again, the room had a pair of doorless hallways evenly spread to the south) the four find themselves in the strangest room yet. Roughly the size of the previous room, this has walls covered in strange glass sheets reflecting nothing, a variety of multi-colored crystals, and various tubes of different metal. In the floor, another automaton is in pieces. This one started out as more human but has since fallen and shattered. Taking note of the face of the automaton, Inar rushes over to it. [11]
"Grusk, you see this?"
"Yeah..."
"This face looks like Cal's!"
"Yeah..."
"Should we take it and show him?"
"Like, scare him with it?"
"No, you know, just show him!"
Grusk is clearly coming up with a plan. "No, I saw we convince him he is being haunted by himself. We'll have this looking out windows, following him..."
Moving on from that conversation and letting it fade, drift back to the other two. Tom is poking another dead ladybug automaton while Rance is scratching his beard.
"Rance, why are they so lifeless here when upstairs five separate golems tried to murder us?"
"I think it's the forest. Or, well, something in the forest." Seeing Tom's quizzical look, Rance continues. "Up there is ash and dust and fire everywhere. And you have multiple golems moving just fine. Down here, you have much less ash, much less heat, and..."
"...and the golems do not work. The same thing keep the forest out is keeping whatever lifespark these things need."
And now back to the other conversation, in which Grusk has laid out a seventeen-step plan to convince Cal that evil duplicates are stalking him, as Inar shouts back to Rance and Tom: "You should come see this, it's Cal's face on a golem. A Cal-lem if you will!" The halfling has been in high spirits, lately. Nearly dying a few times in a week really wakes you up, sometimes.
Walking over, Rance looks down at almost immediately catches on. "This is Jonias. Look, it is an older face that Cal's. There are some wrinkles and scars. The beard is much thicker. This is the great-great-great...well, you know. The old ancestor." [12]
This revelation makes Grusk and Inar both more excited as the plan shifts to convincing Cal he is being haunted by Jonias.
To the right and left of the back wall, doors are shut tight. Plaques on them are painted bright yellow and red text makes the letter stick out. Unfortunately, being in Ancient, no one here can tell what it means. "I think it's a warning."
Rance agrees and points out the arcane conduits split and go both right and left, here, behind those doors. "Warning or not, this is the way we are going." Rance and Tom go towards the door on the left when a loud clatter is heard behind the group. Something, more than one based on the noise, is making quite a bit of racket back there among the now mostly empty bookshelves.
"Tom," Grusk shouts, dropping the Jonias head in his own backpack, "You see to the doors, the rest of us will investigate whatever that is." [13]
{{ GAMEMASTER PHASE }}
There is one of the automatons match the type same as last time. The basic servitor automatons. Which is active. Rust Monsters have worked down into the lab and have been feeding off the automatons, at least the more traditional metal bits of them. This explains why some are completely collapsed and broken like the Jonias one and some of the ladybugs. Can the rust monsters feed off the strange metal in the conduits? 4 → No. That is safe. At least for now. Eventually they might start feeding on the lab, itself. The core metal which is a fuelstone alloy but things that need metal attachments is up for grabs. There are 3 rust monsters and they have been here for at least a couple of weeks and ended up sliding down the rail tunnel and haven't been able to get back up so they have been...hungry.
They were feeding on Pearl when Pearl activated and starting fighting back. A couple of rust monsters got smashed but Pearl is now heavily damaged.
Servitor Automaton (1, this one with a Pearl Marking): AC 16, HP 10, ATK 1 slam +0 (1d6), MV 1/2 near, S +3, D -2, C +4, I -3, W 01, Ch -4, AL N, LV 5
Rust Monster (3, well-fed but getting indigestion from some of the metal blends): AC 13, HP 19, ATK 2 claw +3 (1d6), MV near (climb), S +2, D +3, C +1, I-3, W +1, Ch -3, AL N, LV 4. Corrosive (Metal that touches the rust monster is destroyed on a d6 roll of 1-3).
The servitor has already taking 20 points of damage. Only one-arm remains functional and has one leg drags limply behind it.
[[ PLAYER PHASE ]]
Running into the worn down library, they see another of the weird golems from up top (the ones that look kind of like liveried servants), only this one has a different shaped head and a large pearl in its chest slot, chasing after some strange wolf-sized bugs with spazzing antennas and odd tails. "Rust monsters!," Rance shouts, recognizing them immediately. The Pearl-bearing servitor, moving oddly like its left leg has frozen up and its right arm is dangling loosely, goes to swing its left arm at one of the rust monsters and tilts forward and the falls over. The rust monsters turn around and leap upon it but it's clear that their strange tendrils—extending where mandibles would be on another beetle—are having trouble getting into any good feeding spots in Pearl's innards.
As Grusk steps forward to hit something, anything, with his axe, Inar holds him back. "Um, maybe let them get finished first. No need to fight both of them at the same time."
Unknown to the three watching this fight, Tom has gotten past the door quite handily and is now entering into the southern chamber. [14]
The rust monsters keep attacking the servitor automaton until they hit something vital. The spark goes out and Pearl collapses. Almost immediately, the rust monsters turn and antenna and tendrils are aimed straight at Grusk and Inar. The plate armor is the first non-weird metal these bugs have had for a minute. They are ready to eat. "Well," Grusk says as he trots forward to start the fight on his terms. Bloodlust slams down into the back of the nearest.
Inar rushes forward as support. He brings down The Crimson Star on the back of another one. Rance aims Acid Arrow at the third.
In the southern room, Tom flips the first switch and waits. Nothing obvious happens. [15]
The very hungry rust monsters are not deterred by a little bit of violence and two leap upon Grusk while the third goes for Inar. The rust monsters are crowding on top of both of them with one of the acidic tendrils hitting Grusk in the face. Likewise, Inar is getting burned while trying to find the creatures off. Grusk swings a bit wildly and gets Bloodlust into the same rust monster that Rance's Acid Arrow struck. The Arrow burns deeper and Magic Missiles fly into the same monster to do some minor damage against its shell.
In the southernmost room, Tom flips a second switch. Again, nothing obvious occurs. [16]
The rust monsters continue their attempt at a feeding frenzy. Grusk takes more of the burning hits against his face as he roars out in anger. Inar can hear a sizzling sound as the tendrils try to get into his armor but are stopped by the dragonsilk.
Grusk finishes chopping down the second while Inar gets a quite solid hit into the shell of the third. Behind them, Rance curses as purple sparks fly everywhere and his spellwords turn into strange chant.
Even more shocking, the lights in the room turns on and the lab starts coming to life. Loud gurgles erupt as water starts flowing through pipes in the walls. A breeze can be felt on the face of the adventurers once they stop to notice. A deep hum rumbles from all around. [17]
Grusk ignores the distraction as the remaining rust moster continues to try to eat him or his armor first. The creature can't get past the dragonsilk or there would be hells to pay. Inar has finally broken free from his opponent and has stepped back far enough the rust monster fighting him misses altogether.
Grusk swings around chops an antenna and some tendrils off his remaining opponent as Inar finally gets a good swing in and bashes the life out of the other. Behind them, Rance has managed to get his spells under control and the sparks have ceased flying.
Grusk and Inar run foward to the final rust monster and finish it off with a couple of quick blows. [18]
"What in blue blazes has Tom done?," Rance asks, looking up at the liquid filled globes now glowing with a warm light overhead.
The Effects of Reactiving the Lab
There are several effects that occur across the lab and beyond now that the lab has been turned back on. Let us start with the obvious ones.
The glow globes have reactivated. True enough, a few explode as a side effect of the many-years of disuse. The blue conduits of fluestone-infused copper start glowing the blue-green color of oxidized copper. These two things are the most obvious.
Slightly less obvious is that the air-purification system has reactivated. The water purification system downstairs also turns on and begins pumping water through the place. The combined effect will be a great reduction of smoke and ash over the new few hours. There will be drinkable water again with six hours.
The automatons, those still functional, are now waking back up. Some are confused about the long period of inactivity.
The lab upstairs has had a low level of naturally occuring Light-energy picked up from the forest itself. This is now concentrating. The lab is starting to repair itself and all the gears are turning on.
The portal no longer looks like a swirling mirrored image but more like an actual portal. It thrums and pulses. Jewels in its frame start to light up and blink to a strange timing.
The rail system reactivates and the carts are now monitoring the track for instructions.
Finally, least obvious of all, the Left Hand and Right Hand temples are slowly rewakening. The giant fingers bend slightly. This alters the flow of the immense Light-energy that has been building between then and directs some of that towards the lab. This shift in energy is felt by Uuld Alloces, the salamanders, and even the cultists. The forest is changing to fit the lab. Deep, deep below the earth, something else stirs, as well.
[[ PLAYER PHASE ]]
The four are together again, sitting in the room with the dismantled Jonias (head still in Grusk's backpack).
"Do you smell that?," Inar asks.
"What?," asks Grusk.
"The air, it's...cleaner."
Tom takes a deep sniff and sits upright. "You are right. I have smelled burning ash and woodsmoke for so long that I got used to it but this smells like...air."
Rance looks somewhere between worried and delighted. "When Sir Green Fingers here decided to flip the switches he seems to have turned the whole place back on. We have to tell Cal about this."
"But first," says Grunce, still injured from the fight after Inar's healing spell failed to take, "We need to get what we came here for. Whatever will allow us to go deeper into the Monolith." [19]
The half-orc stands, kicks a rust monster corpse, and then heads west from the library to keep exploring. Tom stops briefly to pry the pearl out of Pearl's chest but then follows suit. Inar and Rance do the same.
The room they enter into a relatively long passage is something like a twin to the "temple" above. It is a lavish place, especially in the glow of the orbs in the tall celing. A large stage takes up a lot of the room, stairs leading up. A table like a larger cousin to the ones they found earlier has a variety of even more advanced tools upon in it. Pedestals hold various odd objects under glass. A shining stone is in one. In another, an amber shows of a large beetle that might have been the inspiration for the ladybug automatons. Other pedestals hold items probably equally as rare, but more esoteric. Unfortunately, several of these have been knocked over and smashed by the rust monsters and the metals inside have been rusted away. [20]
On either side of the table are small stands. The one of the left is empty and a couple of smashed up rust monsters are dead nearby. On the right, though, another of the servitor automatons stares down at the adventurers entering into the room. This one has the same face as Pearl but a large Onyx is in its chest. It stares right at Tom and then leaps off the stage. Grusk gets in the way and breaks a good sized chunk of Onyx's head off in the first hit. Inar goes for a leg hit as Acid Arrow and another arrow from Tom all fly out to hit the servitor. Onyx tries to smash into Grusk but the half-orc deflects the first hit with his shield and the second with an armored arm. [21]
Onyx keeps raining heavy blows against Grusk and Grusk keeps deflecting them but the assault causes Grusk to miss. Inar shatters the leg of Onyx and even though Rance's acid arrow ceases to work, Tom shoots the automaton right above the gem and it ceases to function. Another dead automaton in a sea of them. [22]
"Is anyone else tired? I'm getting tired," says Grusk as he shoves Onyx's body back and uses a dagger to pry the heart-jewel out. Tossing it to Tom. The goblin is already up on the stage and gathering up whatever is valuable there. All these items are tossed in the bundle of holding.
Inar asks Rance, "Through the doors behind us, left, or right?"
Rance looks and notes the conduits are strongest to the south and makes his way to that door and opens it, carefully looking inside. Not seeing much he gestures for the others to follow. Tom hops down from the stage and goes first. The exhaustion, or the treasure, cause the goblin to make a rare misstep. He triggers a trap. As some of the seeming decoration turns out to be odd tentacle automatons, the goblin is already leaping backwards. The others, alerted by his actions, manage to get out of the way and avoid being snared in any of the grasping forms. Back in the stage room, they see the hall they were trying to get into blocked off by the tentacles. [23]
"Umm, let us try the right-hand door," says Tom. Unfortunately, though the goblin can see the sigils that activate the trap, he can see no way to actually disarm it. "We could run through, I guess? Or, you know, we take a running start and try to dive through?" [24]
Rance looks at everyone's tired faces. "I have a better idea. We head back up, take a breather. And we get some more rope."
A NOTE ON XP: Regaining the lab will be worth 3XP. The books to help Cal find out more about translation = 1xp. The other will translate to 3 more XP across the four found treasures (one for each golem + 1 for the two found on the stage). This gives them another 7XP total for this session.
== DOUG'S COMMENTARY ==
In the commentary of as-of-yet-unpublished The GLOW session, I mentioned that felt like my sessions tended to get cut short for this blog and that's half right. In reality, I often solo-play in bursts. Ten minutes one time, fifteen the next, two-and-half-hours the next day. Outside of the context of the blog, it is relatively easy for me to play for four or five hours total for a single "session" in those four to five bursts and still have the mindset and concepts of the session active in my head but with the blog I kind of need to reach a point where I can post things and I shift gears back and forth and lose track of things. Because of this, it is sometimes a bit easy to play for about half an hour, spend half an hour typing things up, and then post that instead of anything like the actual length of what I consider a "full session."
This one feels about right because I played it over the course of a single day and kept returning to it rather than trying to force it to a close. I got food cooked. Hung out with cats and the family. Then, finally got to a point that feels like a conceptual close and it is nice. I am not sure if it is obviously longer or shorter than other Bleak + Pearl posts but it feels more complete in itself.
I like the way the shifts of technology are building. The hints and foreshadowings of things. A few nice coincidences (the dead automatons, the rust monsters, the finding of rope, the traps) all added a good flavor to proceedings.
Double fumbles and Tom not succeeding in a thieving roll were both things that I could have lucked my way out of but sometimes you got to just let the dice speak.
As a final note, I am going to start adding a SOUNDTRACK NOTE to some of these. I listen to a lot of music while solo playing and thought it might be nice to share some of the music and sounds that help inspire some of the moods and ideas.
SOUNDTRACK NOTE: The albums being played during today's session were Dan J. Schulte's Shadows of the Underworld volumes 1 and 2. As released by Heimat Der Katastrophe (as albums 183 and 184). The entire HDK line is perfect for setting various moods and I needed something a bit otherwordly and dark but with a kind of OSR vibe.
== MECHANICAL AND STORY NOTES ==
- 19 on the spell check. Room Contents Check: 1 → empty. The room is largely devoid of things except for the two previously mentioned viperian ophid automatons. 1 is currently active. As a note, since the concept of automaton is a but rusty for a group of more country boys, they will call them golems.
- Do the automatons consider such actions on themselves to be worthy of going into kill mode? 8 → No.
- Rance got a DC16+3=19 INT roll and while it would be impossible for him to guess the full details he at least is able to make some decent deductions.
- Would these guys have a concept of minecart railing? 14 → Yes.
- Rance will go with the party. Grusk says to smash through. Tom wants to investigate. {Grusk | Tom} → Inar sides with Tom, right now.
- Seriously, why did I forget to buy rope. I am normally of the whole 10' Pole and 200' of Rope school of adventuring. Well, live and learn. The equipment tool room does have rope through (18 on an oracle check) and they have 1d6x100' = 500 feet so a good amount. we've already established the tools/gear in the one room is decayed so we'll say there is some in the room with the extra-dimensional coats. Encounter check was negative. Light spell cast was positive.
- Treating this as a climb, Tom does it at advantage and gets a 19+3=22 check. Room Contents: 7 → Monster Mob. Automaton check brings back not only not activated but dead. These will be smaller, normally floating automatons that have all collapsed down. Using the Animals Table from Knave we get 09 → beetles. They look like little lady bugs.
- Grusk gets a nat 20 and nails it (no Luck Points open to regain, though). Inar gets a 19 total. Rance gets an 8. Takes 6 points of damage. Inar succeeds on a Cure Wounds so no problem. Did not test Tom because it feels pointless.
- INT check vs DC15 to see if Rance can follow the path to B3. Whiffed first time, spent a Karma and got a 19+3=22. He definitely susses it out after a minute. Encounter check again negative.
- Room Content check was coincidentally the exact same results. Mob monster but completely dead automaton. I figure I'll take that as a sign and consider this whole floor to be littered with a number of the ladybug automatons. There will power and repair station somewhere downstairs. Shelf check brought back two volumes but the check is still DC21 and Rance only gets an 11 total.
- Room Content 6 → NPC but Golem Activation 6 → completely dead. We potentially had a helper droid but all the these past the doors have been fried. Need a story reason for it. This, by the way, will be the Jonias automaton. Left to run things until the power faded.
- Advantage for Rance to figure it out. Gets a nat-20. Luck point lost earlier returns and Rance figures it out really well.
- Encounter check came up with a hit this time. Just went with the Tomb list because it matched the mood of this place. Got 41 → 1d6 corroded animated armors pursue 1d4 rust monsters. That seems fun considering the vibe.
- Servitor, then rust monsters, then characters. Servitor gets a nat-1. It feels a good time to work that into a full on fumble. Even at the advantage, though, only one hit gets through (for 3hp). Rance got a nat-20 to identify the rust monsters. PCs sit out their turn. Tom, in the other room, gets another nat-20 to get through the door. Since he has his own light source, he is going to enter and explore.
- Rust monsters, then PCs, then Pearl. Rust monsters surprisingly whiff a lot but get in two hits for 7 points of damage, finishing off Pearl precisely. The metal of the plate armor Grusk and Inar wears will be like a siren call. Because it is under the dragonsilk, we'll modify the chance of rust to 1:6. This will not include the shields which are outside of the dragonsilk robes. Grusk gets a hit for 9 (10hp remaining on A). Inar gets a hit for 4 (15 remaining on B). Rance succeeds at Acid Arrow and it does 2 (17 remaining on C). The eastern-most switch sends power to the portal upstairs which is not very obvious down here.
- {Grusk | Inar} → Grusk. Even with advantage, PCs go last this turn. One rust monster gets a hit on Grusk (5hp damage). The other one misses but hits between natural AC and the plate mail protection so we do a check versus the rust. It does not land and the armor resists. The other one gets a hit on Inar for 3hp. Grusk hits for another 9 (this is on C, though, since he's having to swing a bit wildly: 8hp remaining). Inar for 2hp vs B so 13hp remaining. Rance maintains Acid Arrow and gets Magic Missile off but both only do 1hp + 1hp = 2hp total and so C has 6hp remaining. The next switch turns on the automaton control system but since all the automatons in this area are completely drained and inoperable, it does nothing much that is obvious.
- Again, rust monsters win. Two get high hits on Grusk (bypassing armor altogether) for a combined 8hp damage. Inar gets hit in the platemail but the dragonsilk stops the attack from rusting the armor. Grusk does another 6hp to C, killing it. Inar gets a solid hit of 7hp on B (6hp remaining). And, um, in something that has never happened to me before, Rance double-fumbles his Magic Missile roll. Both d20s were a 1. That's too humorous to pass up with a Luck Point. He gets Spell Worm which means his spells are all burning out, one by one. Starting with Magic Missile this turn. Tom has gotten to the Turn It All On switch.
- Rust monsters always win init, apparently. Another hit on the armor of Grusk but again it resists due to the dragonsilk. Grusk gets 7hp damage so only 3hp remain on A. B is killed by 7hp damage from Inar. Rance gets 17+3=20 on his CON check so passes regaining control. To speed up the next round, the team wins init and both Grusk and Inar land hits on the rust monster, killing it.
- Skipping ahead a couple of rounds so the group can, well, regroup. Inar whiffed his Cure Wounds spell even with a luck point spent. Rance has re-upped his Light spell though the one on Tom's necklace has faded.
- Room Content 9 → Treasure (guarded by monster). Here is Onyx. The treasures are 70 → Large Green Scarab encased in amber (worth 75gp) + 66 Magnetic, iridescent chunk of meteorite (70gp). Onyx will be a bit attack-y. It senses Pearl's heart in Tom's possession.
- PCs win init. Gruk gets a heavy 11hp damage. Inar gets 3hp. Rance gets 2p. Tom gets 2hp. 18hp out of 30 are done before it acts. It misses both of its hits.
- Onyx wins. Misses both hits. Grusk misses. Inar gets 7hp damage. Rance drops the acid arrow. Tom does 5 points of damage. That is actually enough to finish it off.
- Room Content 3 → Trap. Large. Magical. Tom gets a 2 and a 4 so misses it even with advantage. Jonias likely would not build a truly deadly trap but let us come up with something interesting. Using Knave's Traps table I get 00 Wrapping + 07 Bending. Fuelstone tentacle automatons come down and DEX DC15 to avoid them. STR DC18 to bring free once caught. Tom makes it. Grusk makes it. Inar makes it with a nat-20. Rance makes it. They all avoid the tentacles but the way is blocked.
- Again, even with advantage, and knowing a trap is there, he misses understanding how to turn it off (getting 11+3=14, one shy of the DC15 needed).
== CREDITS ==
This campaign is played primarily using Shadowdark and SoloDark, both by Arcane Library and Kelsey Dionne (et al).
Additional sources include a variety of things for tables, especially Knave 2nd Edition and Maze Rats (both by Ben Milton), Random Realities by Cezar Capacle, Universal NPC Emulator by Zach Best, and various pieces from Worlds without Number and Scarlet Heroes (both by Kevin Crawford).
Opening art at the top of the post is "borrowed art" meant to be invocative rather than precise to illustrating the story. Image tools to generate some of the art is GIMP and Hex Kit (featuring the Lil Hex Pack and Strange BW Hex Pack).
Photo of the stairs down into the lab proper is "Stairs, Steps, Old Architecture" by depaulus on Pixababy. Recoloring is by me.
The map is from Dyson Logos's "Temple of the Worm" series. There will be some slight modification on the lower levels because those go on longer than I need (so a few passage-ways edited out in some way or just ignored). As usual, I just sort of take each room as I need and ignore some elements or add in elements not in the original.